When we see photos with the moon in the scene, it might vary from a tiny dot in the sky to a massive orange ball that dominates the landscape. So what’s going on? The size of the moon itself doesn’t change, but we can control how big the moon appears in relation to the rest of the photo. We’re not talking about cloning a photo of a large moon and inserting it into another photo – something that usually looks fake. Rather, we can adjust the apparent size of the moon and get it all in one shot without any artificial sleight of hand.
What is a “normal” moon?
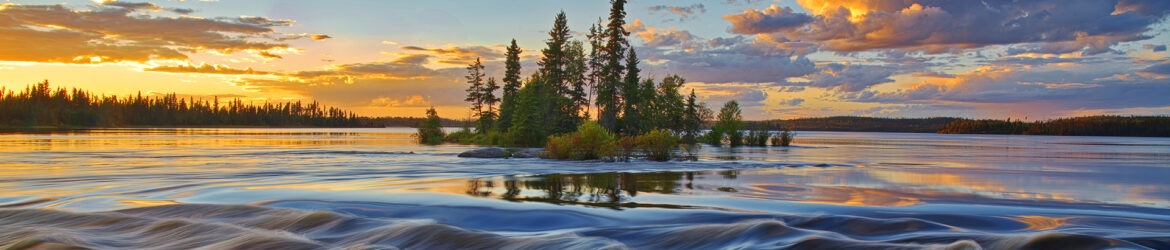
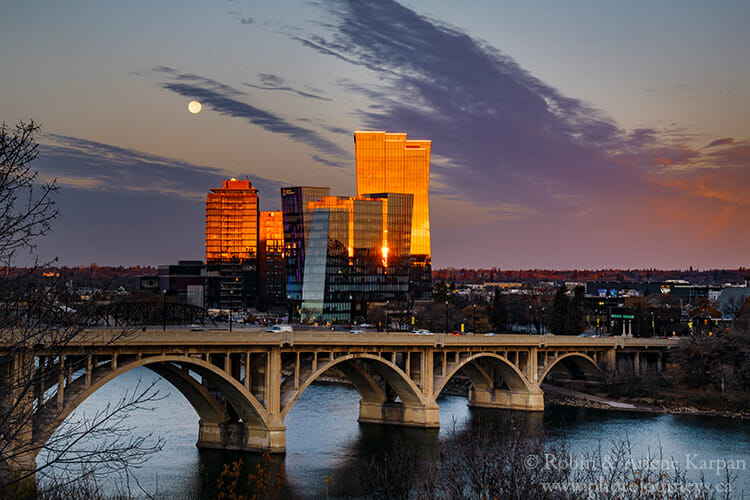
In our “normal” field of view, the moon isn’t very large. If you stretch out your arm, you can easily cover a full moon with your thumb. A normal field of view is generally considered to be equivalent to looking through a camera with a lens at about a 50mm focal length. Sometimes lenses close to this focal length are even referred to as normal or standard lenses. For the following photo of the Saskatoon riverbank, we used a focal length of 55mm. This is very close to the view we would get by simply looking at the scene with our eyes rather than through the camera.
The next image has a focal length of 35mm. This wider field of view makes the moon quite small.

Making the moon bigger
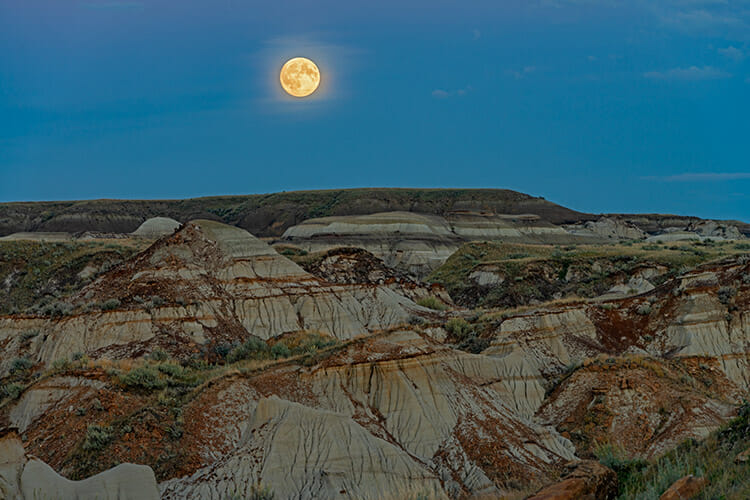
How big the moon appears in the frame depends on the focal length of the lens and how far away you are from your foreground subject. The next image, from Dinosaur Provincial Park, had a focal length of 200mm. Compared to the previous photos, the moon occupies more of the frame and appears to be bigger.
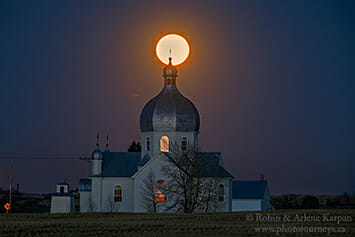
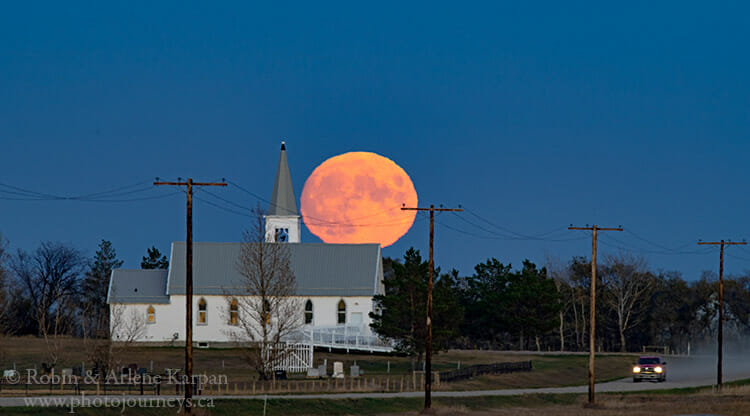
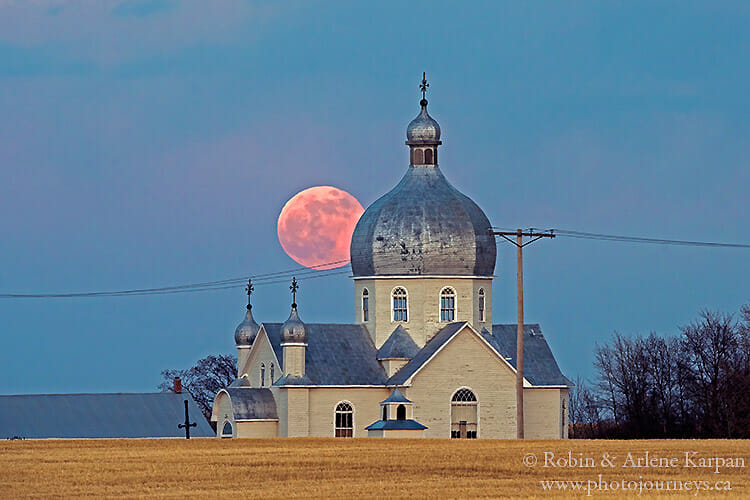
The next image goes a huge step farther by using a 600mm lens, making the moon appear enormous. But the focal length is only one factor, it’s also that we positioned the camera quite far from the church, just over a kilometre away. The farther we are away from the main subject in the frame (in this case the church) the larger the moon will appear.
Where to focus?
The biggest challenge in photographing a scene with a big moon is getting both your subject and the moon in focus. This isn’t always possible, and there is nothing wrong with having your subject in focus and the moon in the background slightly out of focus. Sometimes it might even be preferable. When it is difficult to get both in focus, we always give priority to focusing on the subject, making sure that it is as sharp as possible.
Getting both your subject and moon in focus
To get both your subject and the moon in focus, we need to determine the hyperfocal distance of the camera and lens combination. This is the focusing distance that maximizes the depth of field from front to back. But most critical here, it’s the nearest distance you can focus the lens to get acceptable focus at infinity (such as the moon, sky, and far away landforms).
There are hyperfocal charts you can look up, but the easiest way we have found to get this information is to use the PhotoPills app which is extremely useful in helping to plan all aspects of moon, sun, and night sky photos. Enter the make of camera and the focal length of the lens and it will give you the hyperfocal distance for a full range of different aperture settings.
The reason why this is important is that in order to get both the subject (such as a church steeple) and moon in focus, the hyperfocal distance cannot be farther away than your subject. Otherwise, if you focus on the church, the moon will be out of focus. This is less of an issue with wide-angle lenses, where the hyperfocal distance might only be a few metres in front of the camera, but with long telephotos the distance is much farther. To take an extreme example, our 600mm lens, shooting wide open at f/4, has a hyperfocal distance of just over 3 kilometres! But photographing from that far away is difficult and often impossible, so we need to do a bit of simple math to figure out what is feasible.
Hyperfocal distance is dependent not only on the focal length of the lens but also the aperture setting. A smaller aperture opening such as f/11 or f/16 brings the hyperfocal distance closer to the camera while a larger aperture opening such as f/2.8 takes it farther away.
Using the example of the Pleasant Point Church above, we looked up on the PhotoPills app where we would have to set up the camera in order to see the full moon rise over the church. We discovered that we could photograph from the roadside about 1.1 kilometres away from the church (the app does the distance calculations). We wanted to get a huge moon in the photo, so decided to use the 600 lens. However, we could only get acceptable sharpness for both the church and moon if the hyperfocal distance is less than 1.1 kilometres. The app showed that an aperture setting of f/11 had a hyperfocal distance of about over one kilometre, which is why we used that setting.
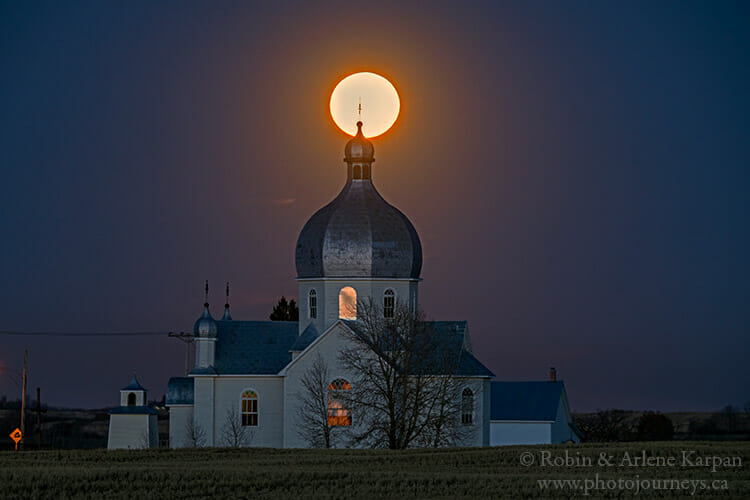
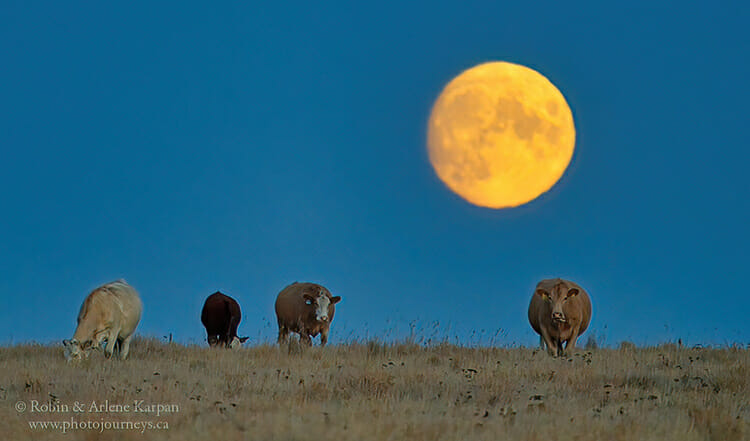
The other option is to use a lens with a shorter focal length. For the following photo, the farthest we could be away from the church was about 550 metres because of road access. This would be too close for a 600mm lens to work to get both the church and moon in focus. So we opted for a zoom lens extended to 290mm. At f/8, the hyperfocal distance was a bit closer than the distance to the church. So by focusing on the church we were able to get acceptable sharpness on the moon as well.
Shooting the moon can be a lot of fun. With a bit of planning, we can decide exactly where it will be in the frame and how big it looks.
SUBSCRIBE to Photojourneys below
Feel free to PIN this article