
All photos © Robin and Arlene Karpan
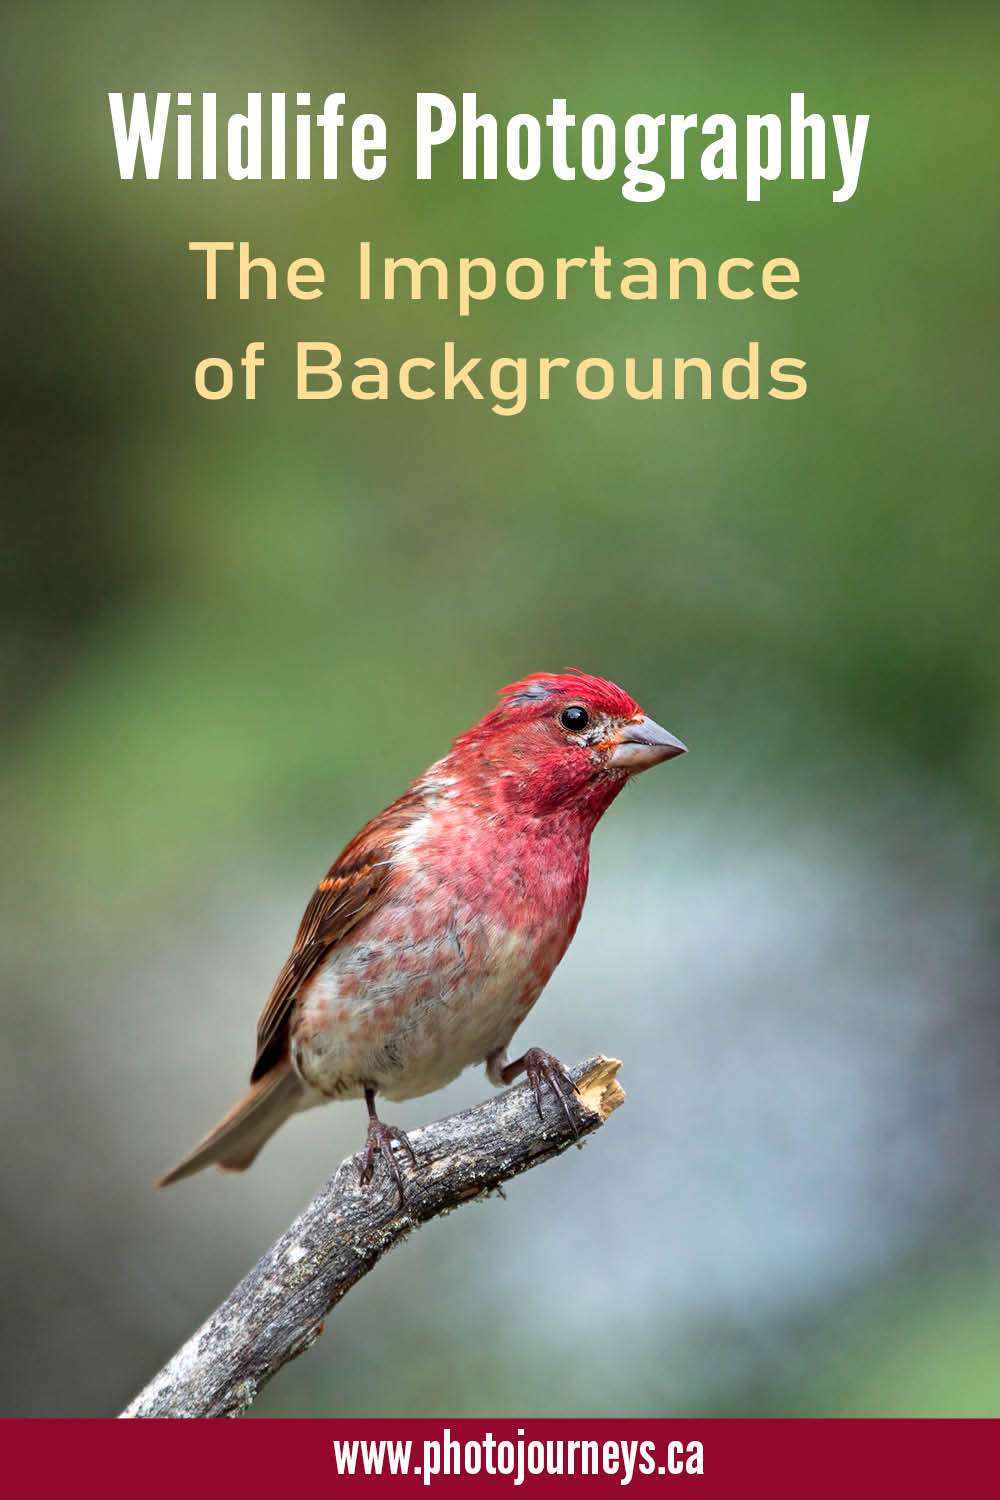
With wildlife photography, the background can be just as important to the success of a photo as the main subject itself, yet it is often overlooked in the excitement of the moment.
It happens to all of us when photographing wildlife, whether it’s birds in the backyard or chasing the Big Five in Africa: we find that elusive critter, are careful to select the proper exposure and critical sharpness, and still end up disappointed because of the setting. A distracting background, a tree trunk growing out of an animal’s head, a bird lost in cluttered foliage, or an overly busy scene can undermine an otherwise strong image. So here are a few tips and tricks to keep in mind while you’re in the field.
Use a wide aperture to blur the background
This is the most commonly used technique in wildlife photography when we want the subject to stand out from a busy or distracting background. Set the aperture to a wide opening, which is the smallest numbers such as f/2.8, f/4 and so on, depending on the lens. This decreases the depth of field from front to back so that your subject is in focus, but focus falls off more quickly both in front of and behind your subject. The other advantage is that a wider aperture lets in more light, allowing you to use a faster shutter speed, which is usually what we want for wildlife that doesn’t stay still.
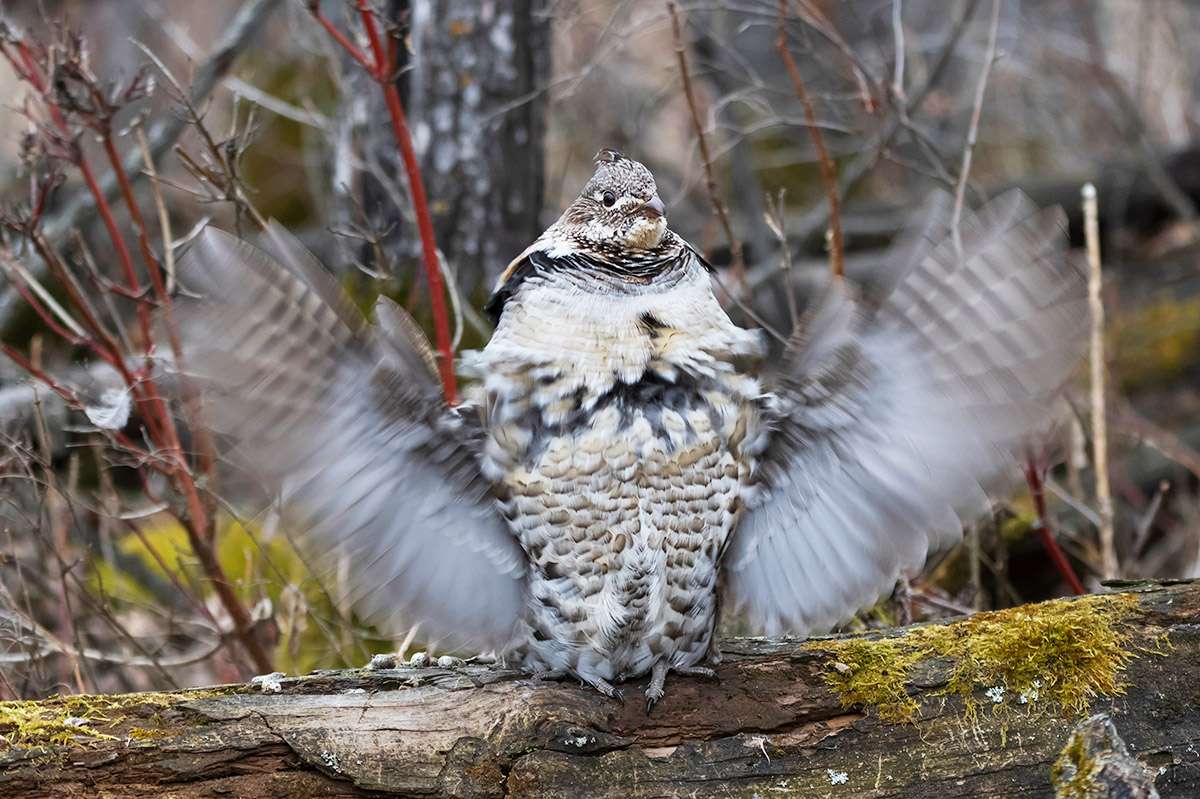
Fill the frame to minimize distracting backgrounds
Sometimes the wildlife doesn’t give us much choice. We find a photogenic subject, but the setting is messy, and we can’t move to get a different vantage point. That was the case in the following photo of a male ruffed grouse on a drumming log. That was his spot to carry out the fascinating drumming ritual with rapidly flapping wings to try attract a mate and establish territory. I was in a blind to avoid spooking the bird. The background is quite complicated and has similar tones to the grouse, which tends to blend into the scene. So I chose to zoom in on the bird to fill most of the frame, and minimize the amount of background.
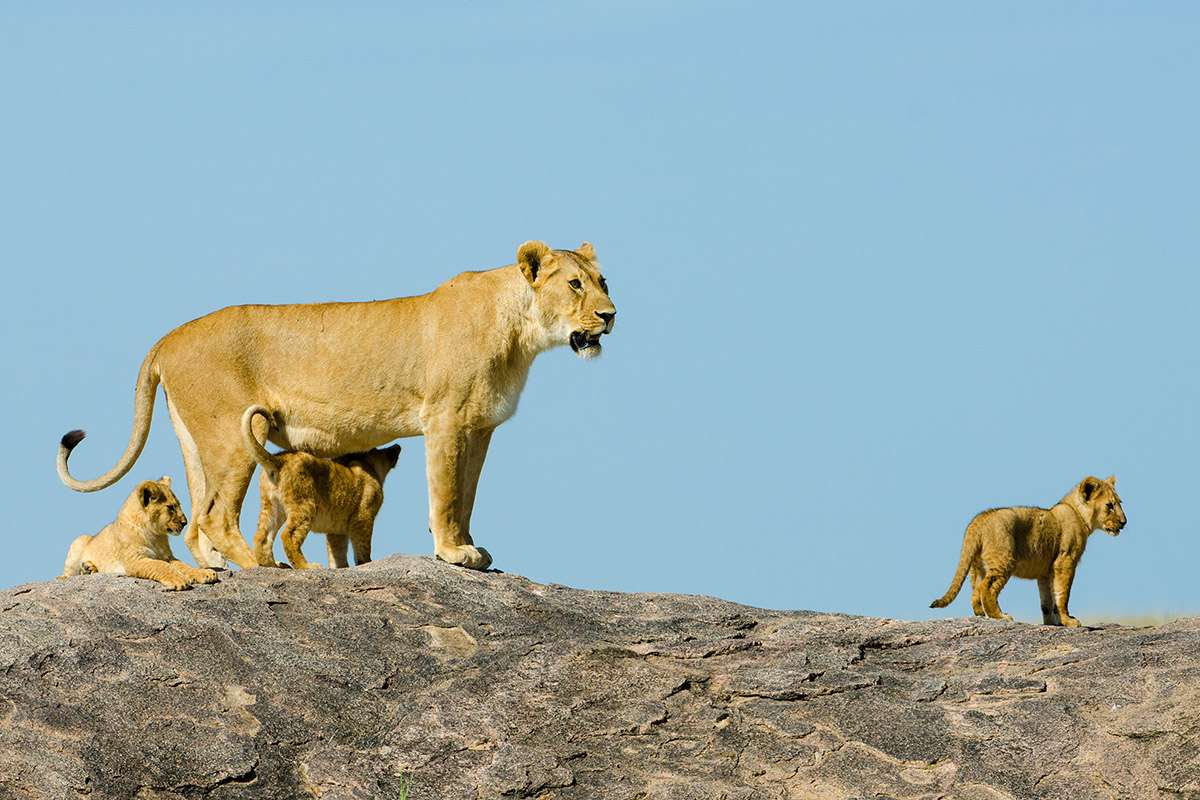
It was a similar case with this lion. The background was complicated and less than ideal. By taking a tighter shot, most of the background is eliminated, making for a cleaner image.

Look for ways to frame the subject
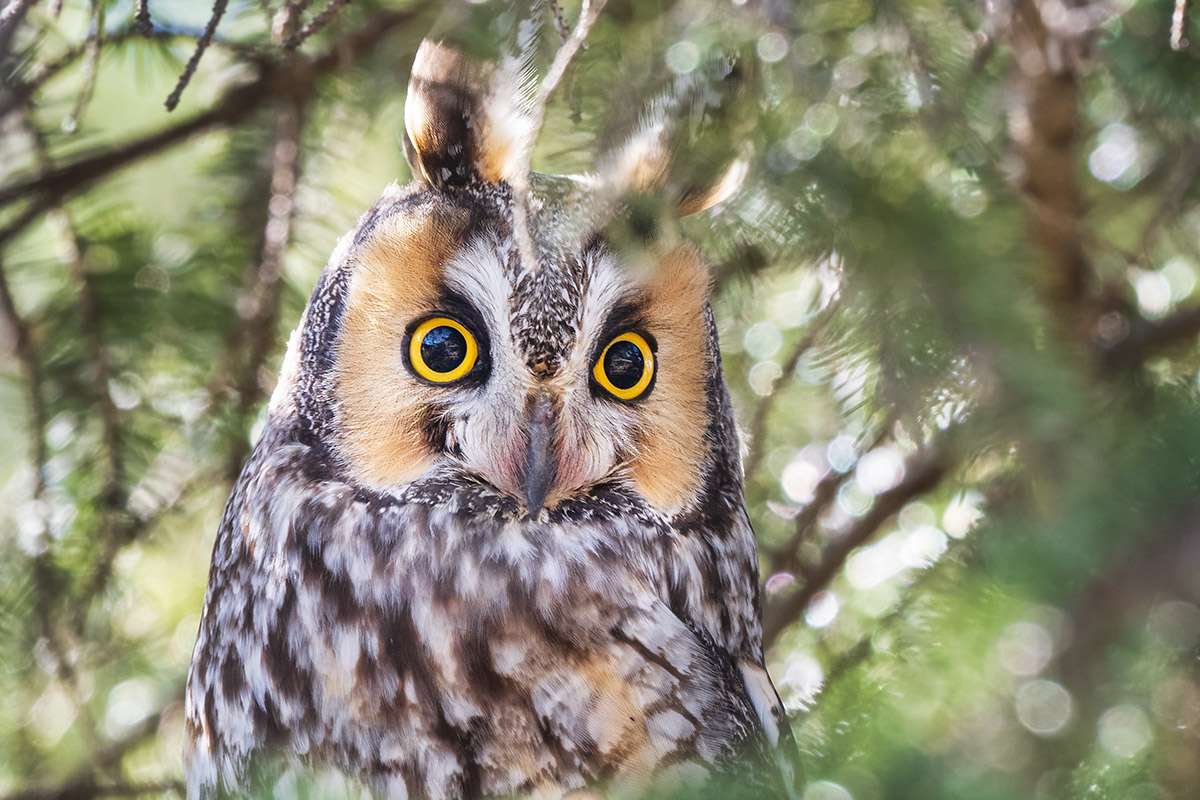
Sometimes we can make use of a complicated background to our advantage if we can find a way to frame it. In the following photo, the long-eared owl was in fairly thick bush, making it difficult to see the entire bird clearly. But by carefully moving around, I found a spot where the owl seemed to be peeking through the forest.
In the following photo, we can only see part of the lion’s face by through a small gap in the trees. While a shot of an entire lion is fine, photos such as this of a lion lurking in the bush can be used to tell a story and might be more interesting than a simple portrait.

Look for background colours or textures that contrast with your subject
A green bird against green leaves, or a dark bird against a dark background may not stand out that well. When there’s an opportunity to change your vantage point, see if you can get the subject against a different background. Sometimes just moving to one side might make a difference. A contrasting colour might also help to perk up an otherwise drab scene.
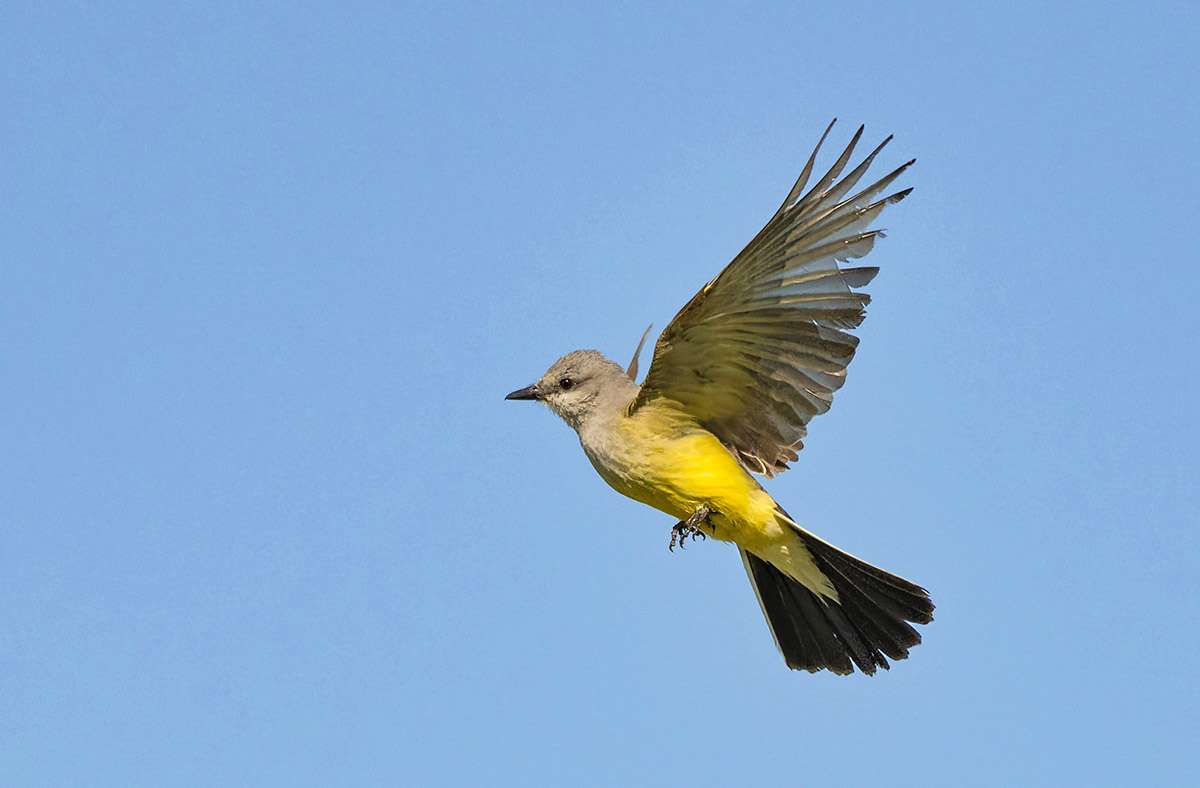
Use the sky as a backdrop
The sky, and especially a clear blue sky, makes a great, clean and uncomplicated backdrop. This is easiest to do with flying birds, but even with other animals, we might be able to get lower to the ground so that the sky is behind, rather than an opting for an unphotogenic background. Also watch for opportunities to photograph animals that are standing a bit higher up, such as on a slight rise or hill, with the sky behind.
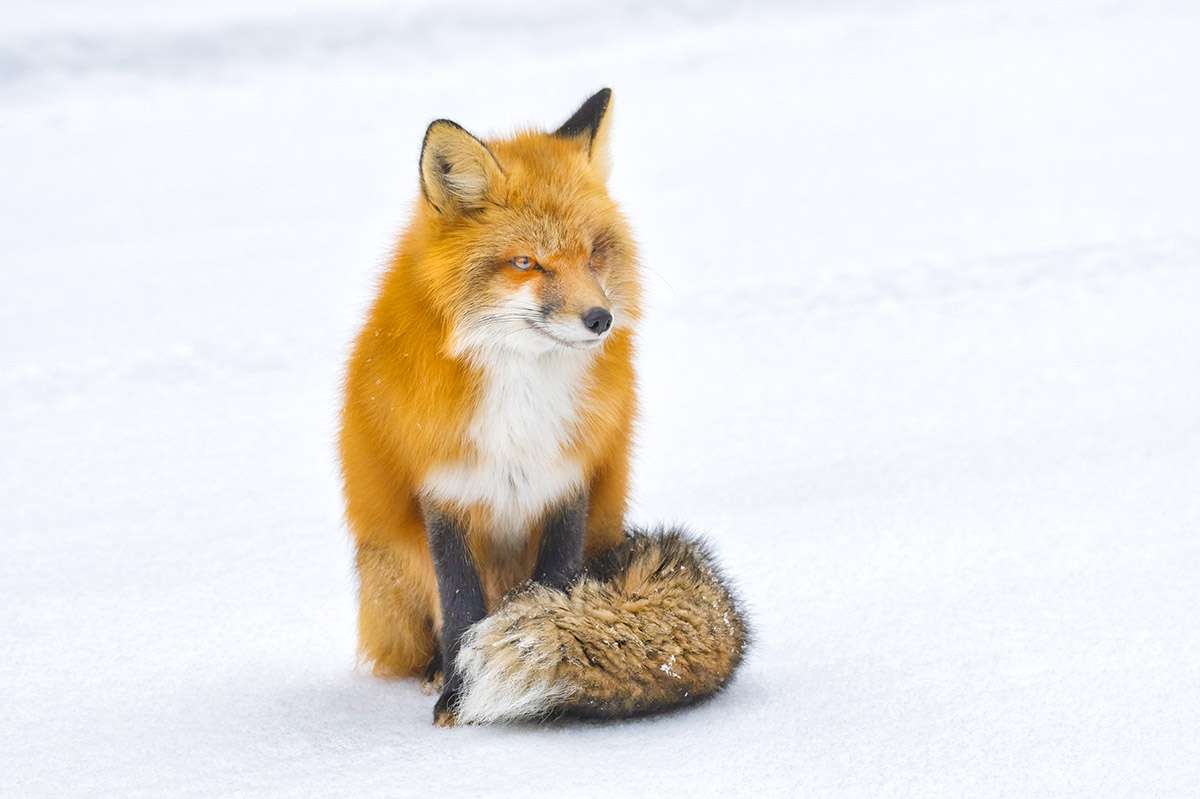
Use snow as a backdrop
Winter provides a great opportunity to make wildlife stand out. If you can position yourself so that the animal is against a pure sheet of snow, it really pops. Frosty trees and other vegetation make an attractive backdrop as well. The added advantage is that for fur-bearing animals, winter is when they look their best with thick, luxurious coats.
Sometimes we can control the setting
The following photo of a purple finch was taken in our backyard. Birds will often rest for a few seconds when approaching a feeder. We placed this branch above the feeder for that purpose. Another important part of the setup is to position the branch and feeder far enough away from background vegetation so that it goes out of focus, allowing the bird to stand out.

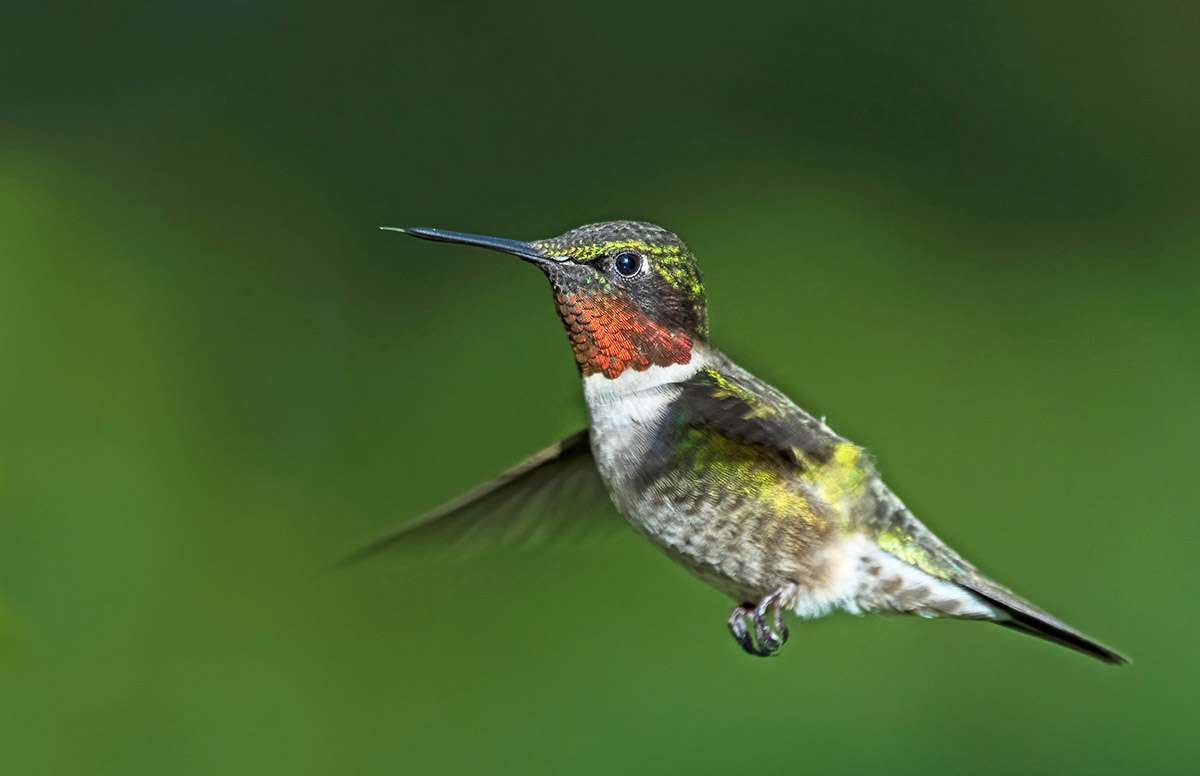
In the next photo, the hummingbird is near a feeder, but we can’t see the feeder in the frame, giving it a more natural look. Hummingbirds often feed by repeatedly taking a drink from the feeder, flying backwards a few inches, then drinking again. I took this shot during one of those brief backwards flights. Most importantly, I positioned the feeder so that when the hummingbird backed away, it would be against a nice, clean out-of-focus background in the distance.
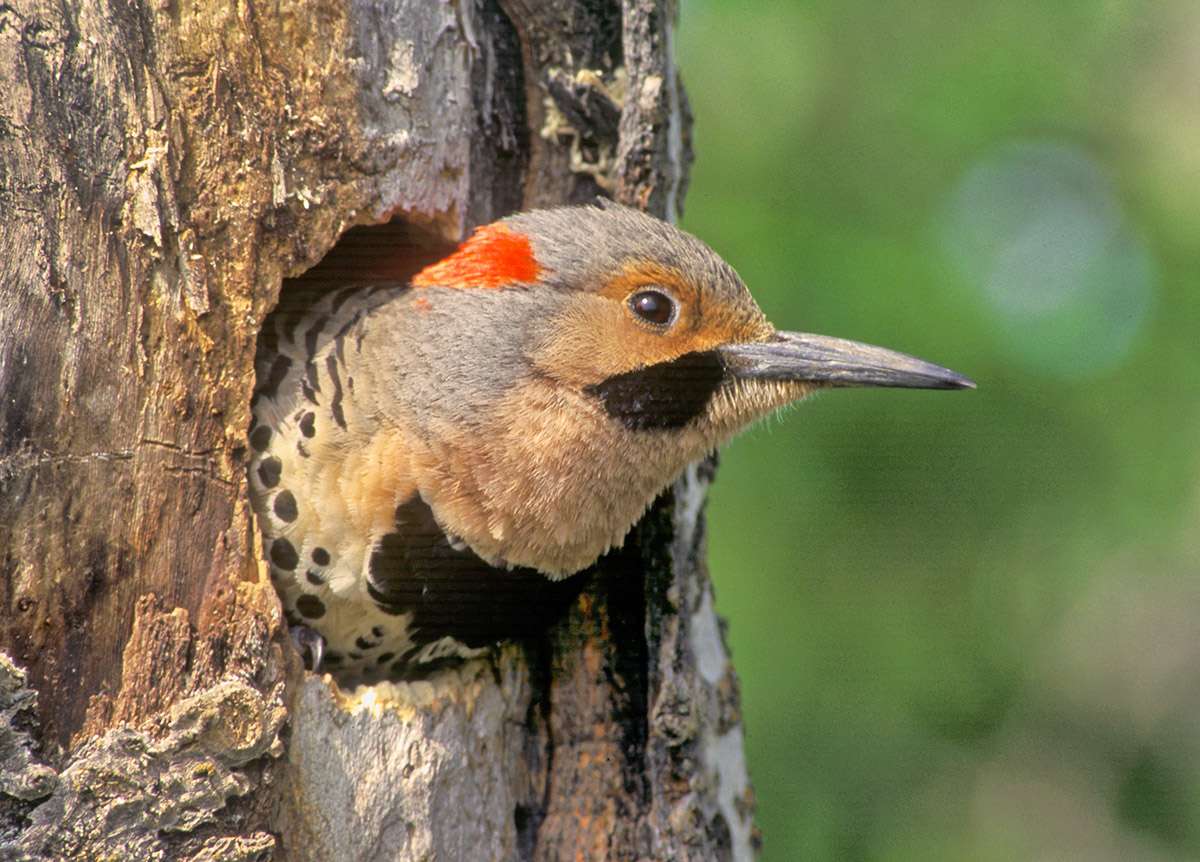
We set up a blind to photograph a northern flicker that constantly flew in and out of the nest during nesting season. Before it flew away, it would sometimes rest in the opening and look around. While this was ideal for photography, the background on the right side of the frame was overly bright and distracting. So I took a small branch of green leaves and tied it to a tree trunk that was in the line of sight, but far enough away that it would be out of focus. This made for a much more pleasing backdrop to the image.
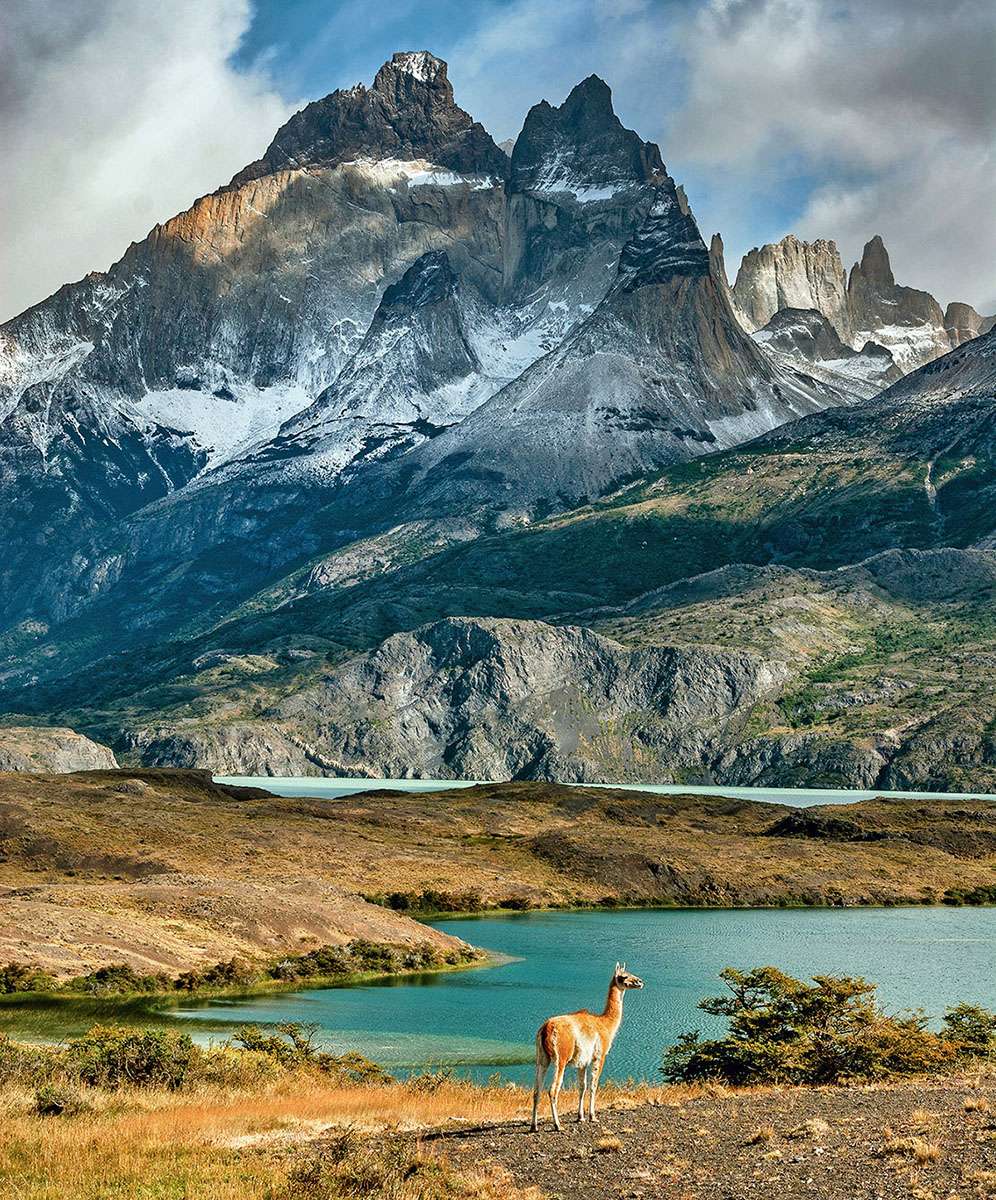
Put wildlife in its environment
So far, we’ve talked about photographing wildlife mainly as portraits. But when wildlife is part of the environment, it can make for a more compelling image. In this case, we want more background, and depending on the circumstances, the animal might occupy a fairly small part of the frame.
In the following photo of a guanaco in Chile’s Torres del Paine National Park, the setting is every bit as important as the guanaco. This was a rare instance where the wildlife actually stood where we had hoped it would go. So it was an opportunity to zoom out and take an environmental shot.
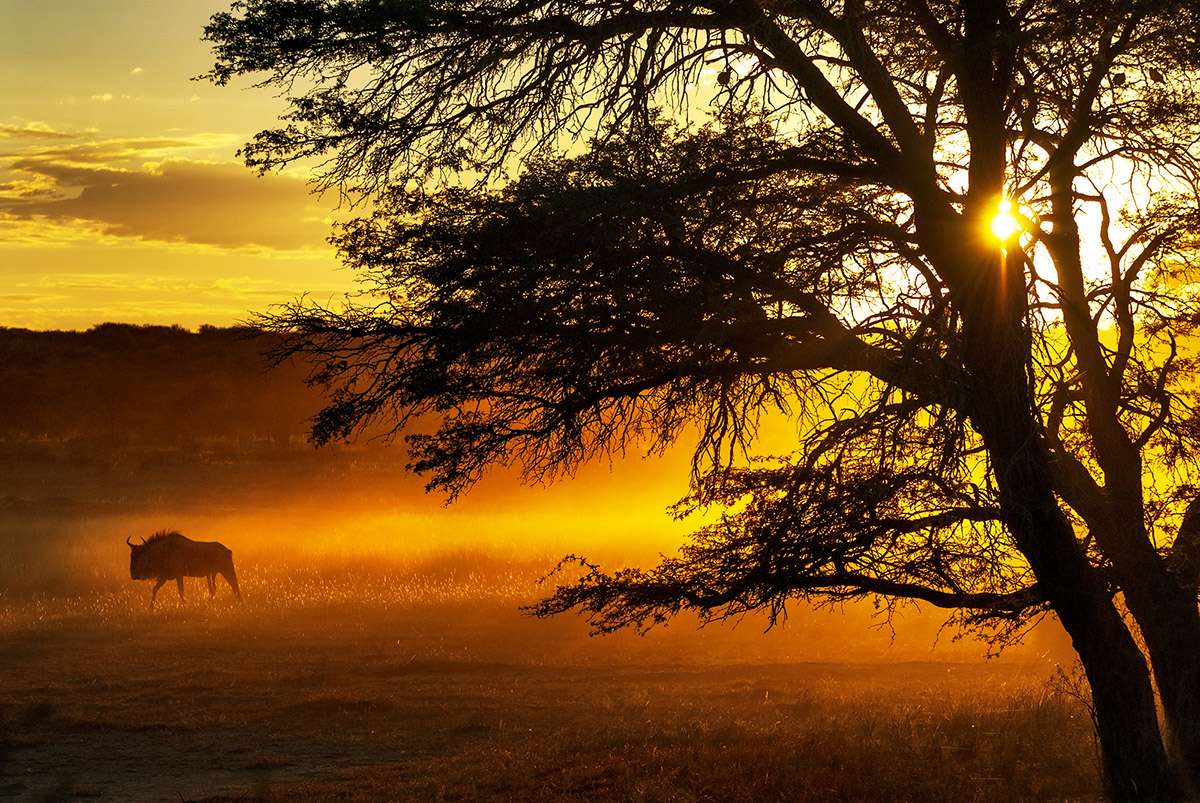
Similarly, the wildebeest in the next photo is quite small in the frame. I had taken closer shots of the animal, which were okay, but I much preferred the scene when I zoomed out to show the wider context. This animal was the last in a herd of wildebeest that had run through, filling the air with dust which took on a golden glow with the rising sun.
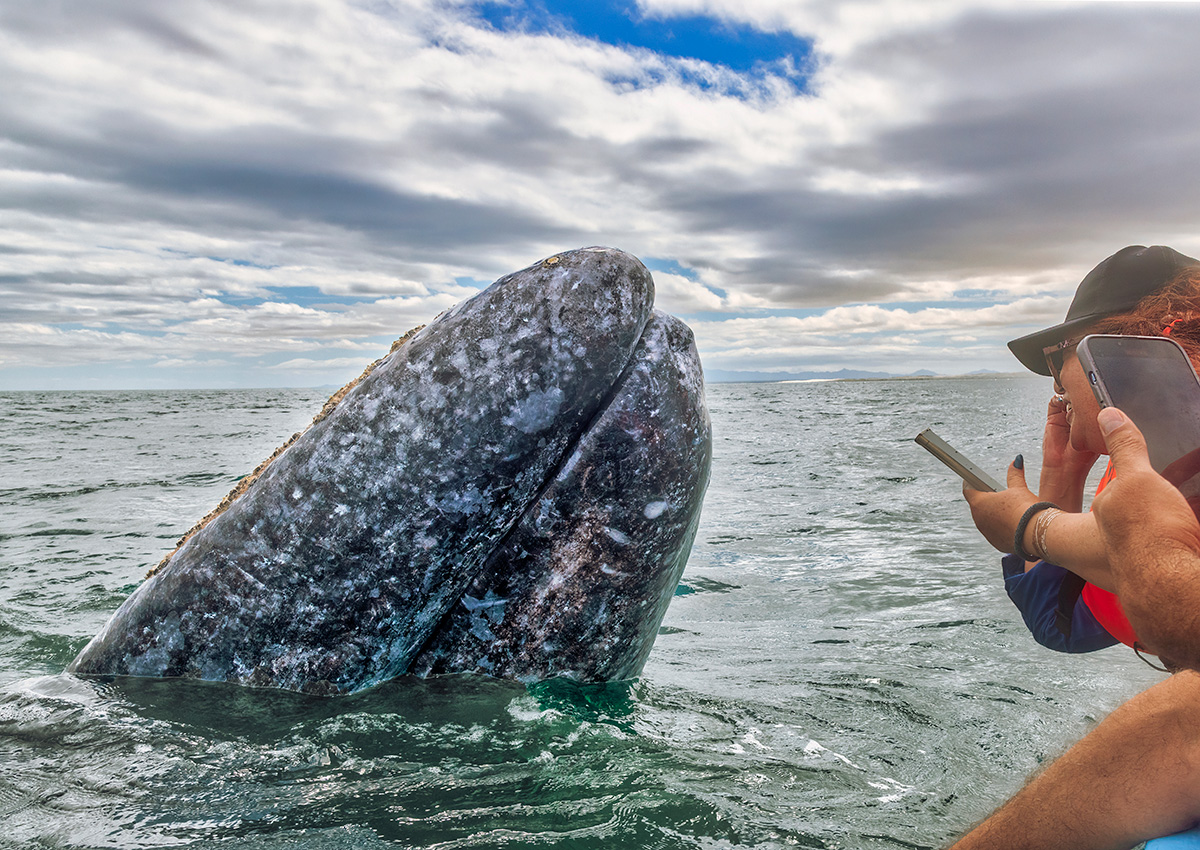
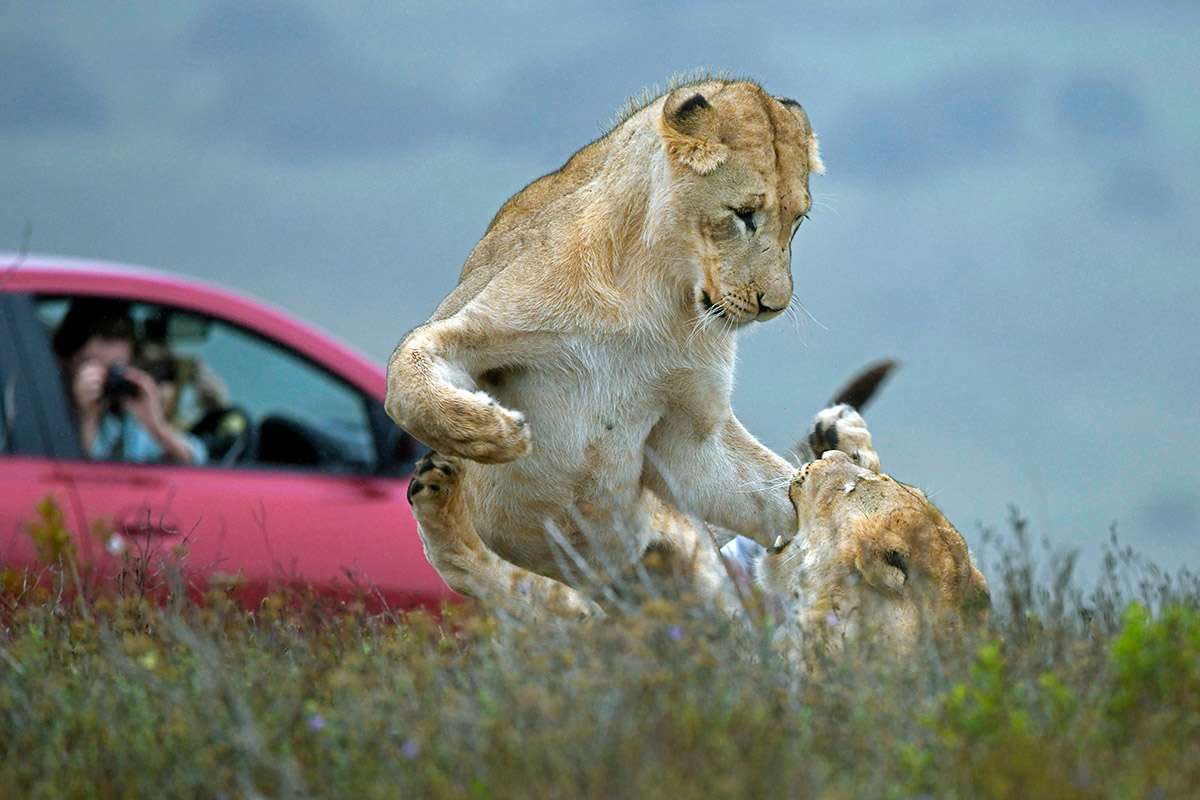
Should you include people in the image?
Most of the time in wildlife photography, we don’t want people getting in the way or even man-made objects. But occasionally, it might make sense if it helps to tell the story. In both of the following photos, we included people to show how close we could get to the wildlife.
Final thoughts
The key is to always be aware of the background when photographing wildlife. It’s useful to always ask – does the background add to the image or detract from it? Then it’s easier to decide what to do – show the wildlife in its environment or get in close for a more intimate shot.
Other Photojourneys posts on photography that you might enjoy
SUBSCRIBE to Photojourneys below
Feel free to PIN this article on wildlife photography and the background