All photos © Robin and Arlene Karpan

Most cameras today offer you the choice to shoot in two main file formats – JPG or RAW. What’s the difference and why does RAW give you better results most of the time?
The easiest way to look at it is that with JPGs, the camera decides how the photo should look, while with RAW, you decide. Think of it like baking a cake. You can simply buy a ready-made cake mix which is quicker, less work, and will yield a fairly predictable result. Or you can start with raw ingredients, add this or that, and make adjustments to get the taste you want – more work but likely a superior result.
With a JPG, the camera does some processing so that the photo usually looks reasonably good right out of the camera, assuming of course that it was exposed correctly. With RAW, on the other hand, there is no processing so the photo usually appears quite dull and lifeless, often lacking in colour and definition.
So why on earth would we want a crappy-looking photo? The reason is that it contains a lot more data than a JPG, and we can use these details to come up with a far better finished photo when we process it. With a JPG the results are “baked in”. We can still make some adjustments to brightness, contrast, and colour, but not nearly to the extent that we can with a RAW image.
RAW images need processing
RAW images are not intended to be used straight out of camera. To begin with, they usually don’t look very good, and they are large files. Each camera also has its proprietary file type. For example, Nikon’s RAW file is called a NEF, for Olympus it’s ORF. So RAW files are not intended to be shared. Once we process a RAW file, we save it as a JPG which then can be shared everywhere or be used for publication.
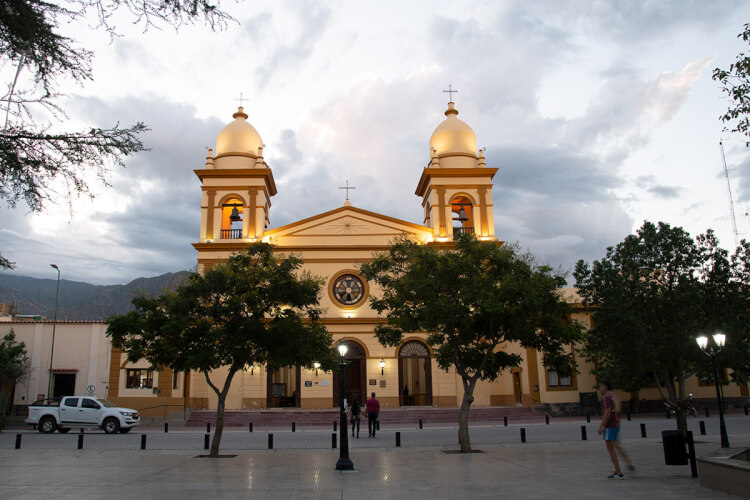
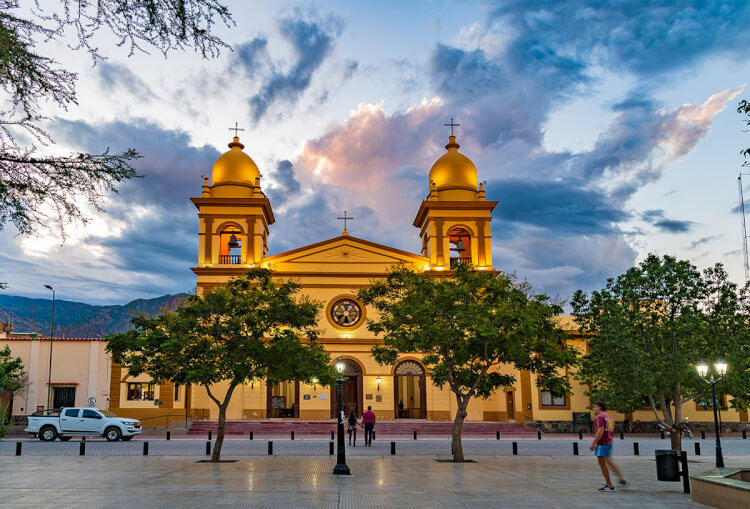
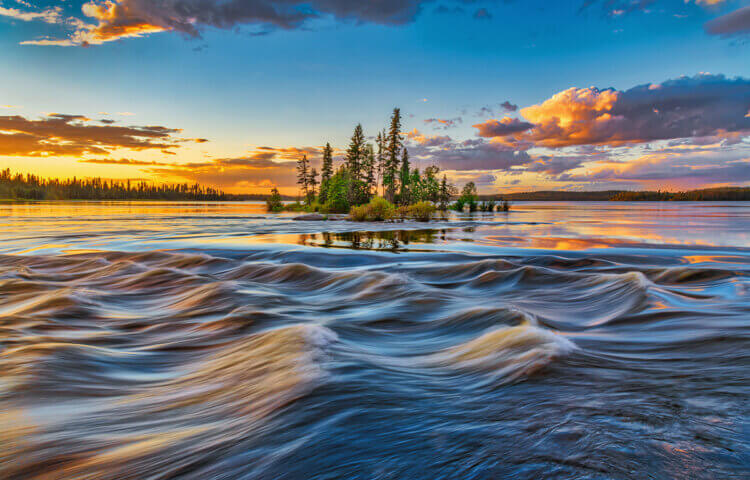
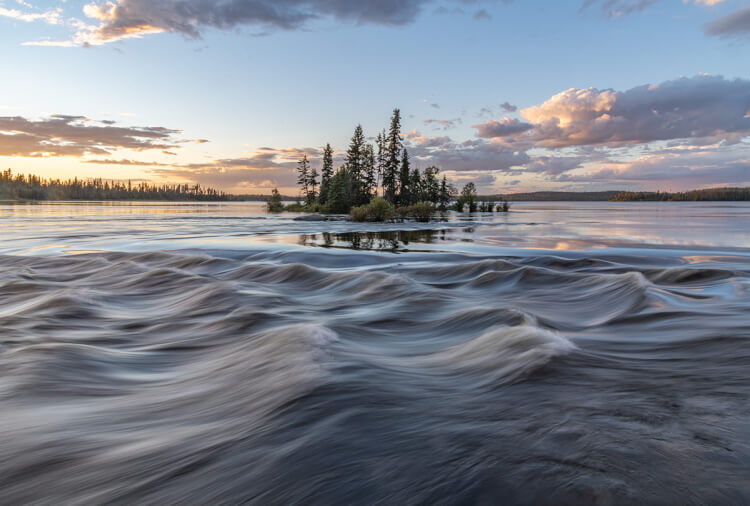
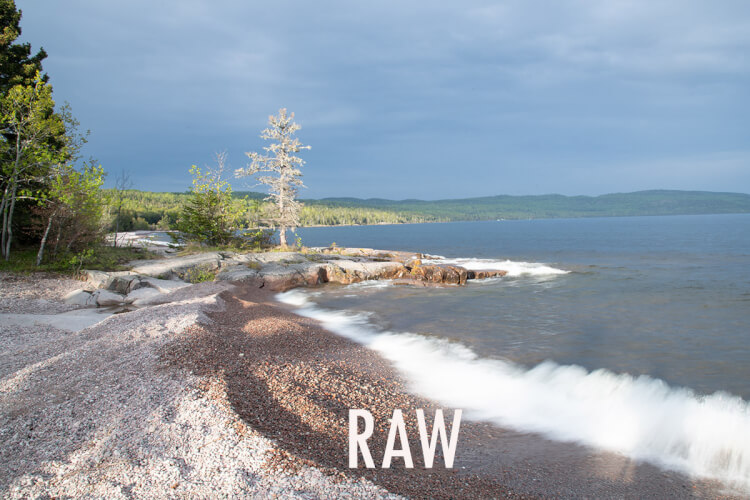
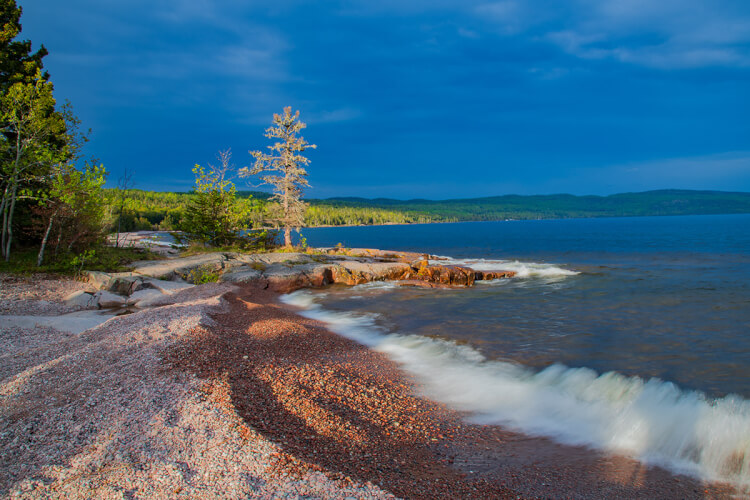
The above is an example of a RAW image that needed only minor processing. The first is the RAW file which looks flat with little detail in dark areas, such as the trees, and a bright sky lacking in detail from the evening just after sunset. The second photo has been processed to bring back the contrast between light and dark.
To make use of RAW files, we need processing software. We use Camera RAW which is part of Adobe’s offering that also includes Lightroom and Photoshop. Another prominent one is Luminar NEO (see our article which introduces this software). However, these programs come with a cost. There are also some free programs. One that a lot of people use and seem to like is RawTherapee, though we haven’t personally used it.
We mentioned that RAW will give better results “most of the time”. But there are times when a JPG can be just as good. For example, when you’re taking a photo in bright, even light, and get the exposure right, you may not notice much difference. Where RAW files really shine is when we have complicated lighting.
Let’s say that you’re photographing a sunset with the sun low in the sky, but you also want to capture detail in the foreground. No matter how good the camera is, it can’t properly expose for such an extreme range of light and dark. In challenging light, the JPG straight from the camera and the RAW file might look much the same.
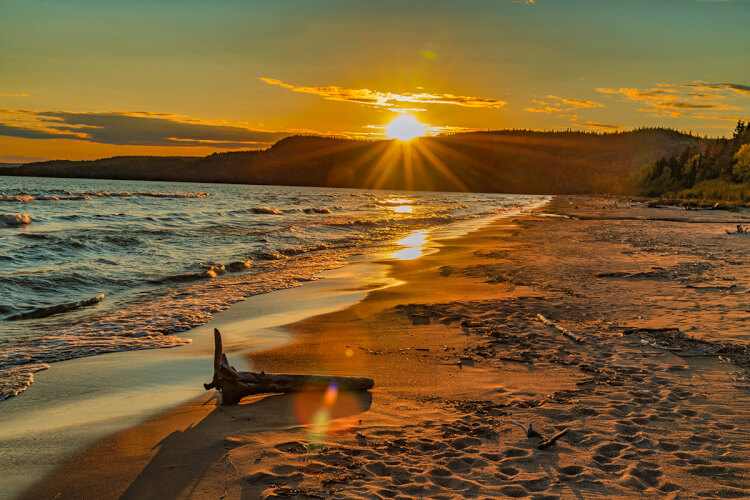
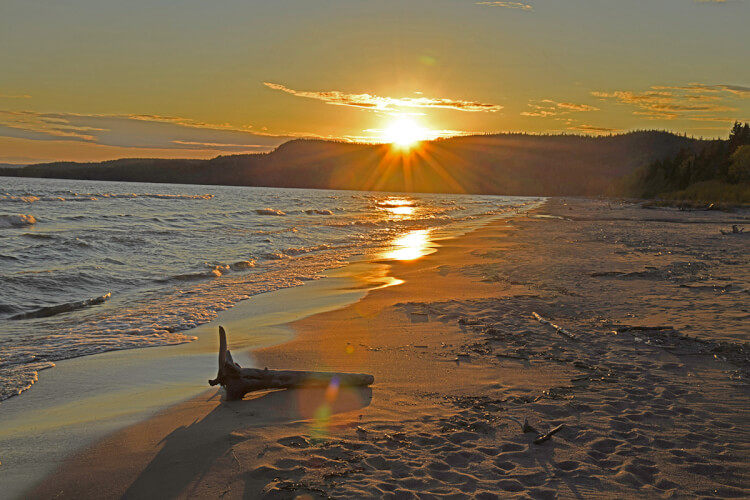
This was the case in the following photo of a beach on Lake Superior, where I took the same shot both as a RAW file and as a JPG. They look almost the same. The reason why this photo is so dark is that it was necessary to expose for the highlights which are in the sun and sky. If I had exposed to bring out more detail in the foreground, the sunset would have been completely washed out with no colour or detail. As a general rule, it is easier to recover details from the shadows than it is from highlights. When highlights are blown out, the details are gone and there is nothing we can do to bring them back.
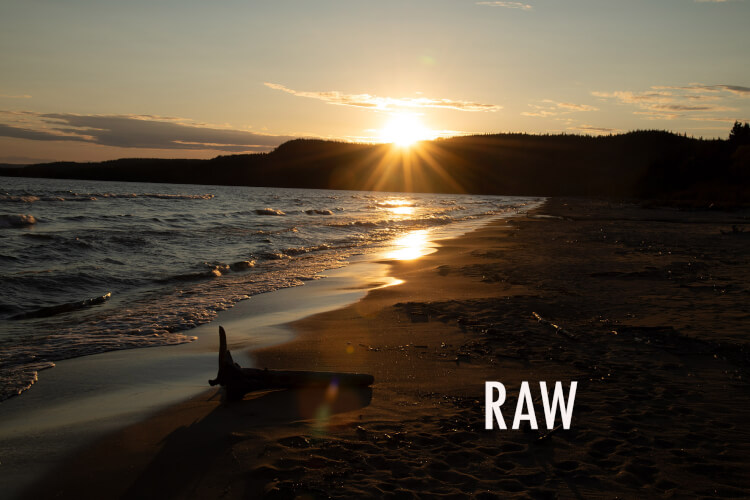
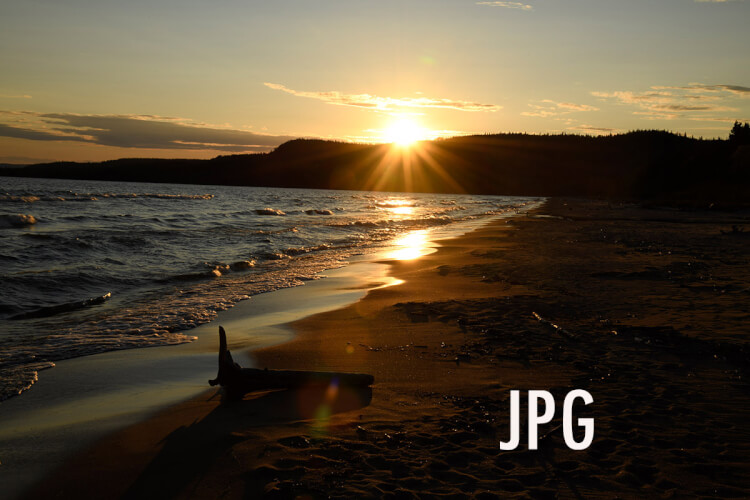
While the above photos look similar, there was a huge difference when I processed the RAW file (first photo below) and tried to make adjustments to the JPG file (second photo below). The details in the beach were still there in the RAW file – they just had to be brought out. But the details in the JPG were gone. When I tried to open the dark shadow areas, the result was a mess.
Sometimes a RAW photo can save you from mistakes. The following image is from an evening with wonderful golden hour light. But I didn’t get the exposure right. It’s way over-exposed and the nice evening light was all washed out. However, the highlights were not blown out and still had details. Since this is a RAW file where the information is still present, I could recover the highlights and bring the photo back to its proper exposure and colour.
Pros and cons of each file format
Nothing is ever simple and straightforward. Here’s a brief summary of the main pros and cons.
Advantages of Shooting in JPG
- It’s a lot simpler. There is no extra processing to do, although you can still make minor adjustments to the image if needed. It’s best for those who like to share images without a lot of fuss and bother.
- JPGs take up a lot less space on your camera memory card and hard drives since the file sizes are much smaller than RAW images. Your camera can handle small files faster and not get bogged down, such as when taking a burst of several shots of moving wildlife.
- Sharing on social media, or sending images to friends, is simpler and faster.
- You can adjust the compression size of the JPG to suit your style of shooting. Most cameras give you a choice of different JPG sizes and qualities such as basic, fine, etc. We always recommend shooting at the highest quality setting so that you have more flexibility in how you use the image. But if you only use your photos for social media, or sending to friends online, then a smaller JPG size is sufficient, saving room on your memory card.
- Unlike with RAW files, there is no extra software to buy or learn.
Advantages of Shooting in RAW
- The big one is recovering shadows and highlights as shown in the examples above. If you choose RAW for this reason alone, it will be worth it.
- White balance settings on the camera are not written in stone. With a JPG format, on the other hand, the white balance you choose is set and you can’t change it after you take the photo. But you can change it when processing a RAW file. While it is usually sufficient to simply leave white balance on auto, sometimes it is beneficial to choose other white balance settings for special circumstances such as night photography or indoors under fluorescent lights. If you get it wrong, you can always make adjustments in processing.
- RAW gives you a lot more colour tones and other details to work with when processing your photos.
- With processing software, you have access to other adjustments such as sharpening, noise reduction, contrast, or colour balance. You can even adjust the exposure somewhat in a RAW image.
- Edits are non-destructive. When you edit a RAW file and save the final image as a JPG, the original RAW file remains unchanged. So if you decide that you didn’t like the way you processed it, you can always start over.
- It makes picture-taking more fun. The more control you have, the more rewarding photography becomes.
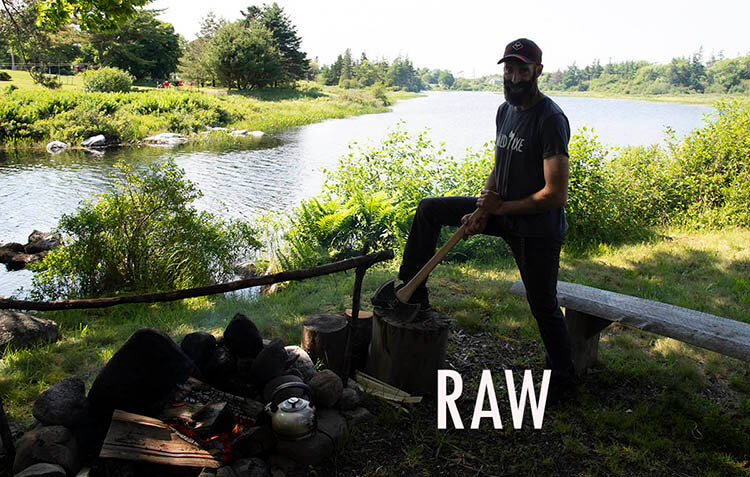
This is an extreme example of what is possible. We visited Wild Axe (an axe throwing and lumberjack sports centre) in Nova Scotia in mid-afternoon – during the worst possible light for photography. The lumberjack is standing in the shade while the background is in full bright sun. I couldn’t increase the exposure any more than this without blowing out the highlights, which left the shadow areas very dark. However, since the data was embedded in the RAW file, it was possible to balance things out in processing.

Ease into RAW shooting
If you’re new to shooting in RAW but interested in giving it a try, a great way to ease into it is to set your camera to take a RAW plus JPG for each shot (most cameras will allow you to do this). Then play around with each file and compare the results. Some processing programs allow you to download a free trial version. Or you can look into one of the free programs.
SUBSCRIBE to Photojourneys below
Feel free to PIN this article on photographing in RAW or JPG