All photos © Robin and Arlene Karpan

I have just recently started using the photo editing software Luminar Neo. I’ll be following up with more details as I get more experience, but here are some of my early impressions of a powerful program that is fun to use.
What is Luminar Neo?
Luminar Neo is a relatively new software application from Skylum. Luminar has been around for a while, with previous versions such as Luminar AI and Luminar 4. Since Luminar Neo was released last year it has been updated several times, so it is constantly being improved and bugs fixed.
Luminar Neo can be used as a plug-in for Adobe Lightroom or Adobe Photoshop or as a stand-alone editor that can handle everything from RAW processing to a range of sophisticated tasks, many powered by AI (artificial intelligence). Unlike Lightroom and Photoshop, where you buy a subscription and keep paying every month, with Luminar Neo you have a choice. You can opt for a subscription model with either the Explore or Pro plan, or you can buy a Lifetime version once and it’s yours forever.
![]()
A major difference is that with the subscription option you get all future upgrades for Luminar, while for the one-time Lifetime license you get software updates but not new Luminar versions. Extensions Packs such as some of the specialized AI tools are included in the Pro subscription but are optional purchases in other plans. The various options are outlined in detail on the Skylum site. All the products have a 30-day money-back guarantee if you find that they don’t suit your needs.
A fascinating side-story is Skylum’s history and its base in Ukraine, which unfortunately has had to contend with a brutal invasion from Russia. Despite working in a war zone, they have been constantly updating Luminar Neo and adding new products, and have come away with a few awards for their efforts.
This article may contain affiliate links. If you make a qualifying purchase through one of these links, we may get a small commission at absolutely zero extra cost to you.
Play fast and easy with your photos
Two things that immediately stood out for me were the ease of use and speed of use. At first glance it seems to be a lot more user-friendly compared to Lightroom or Photoshop, for example. Luminar Neo is sometimes recommended for those who are new to photo editing and may be intimidated by the complexity of Photoshop. While this is a valid observation, it certainly shouldn’t be considered only as a beginner’s program. For the beginner, it is possible to do some impressive edits almost immediately, while the experienced editor can delve deeper into the software and make fuller use of the many functions.
I re-processed some older photos that I had originally done using Camera RAW and Photoshop. With Luminar Neo I could often get comparable, and sometimes even better results with a lot less work and time.
Presets
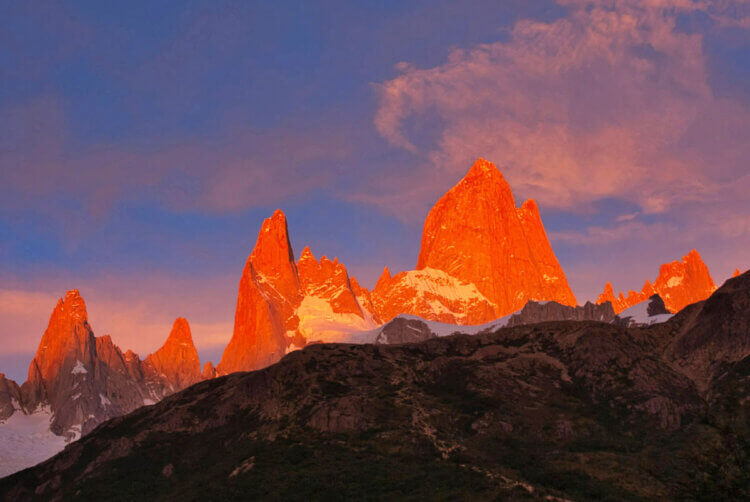
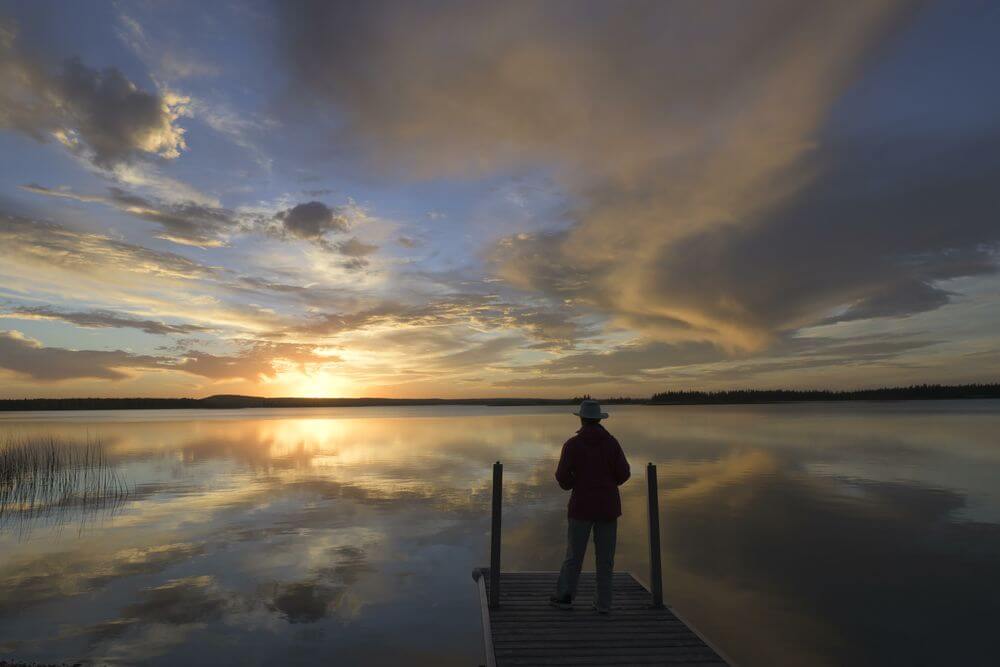
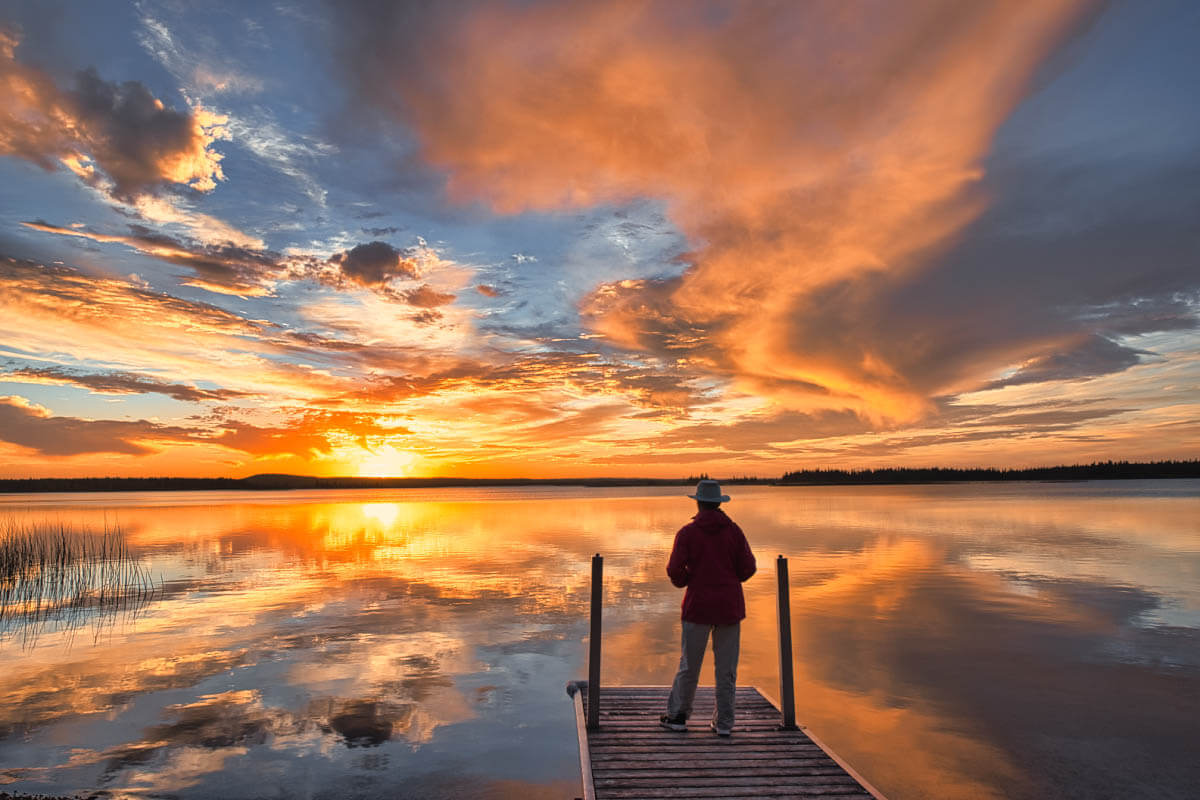
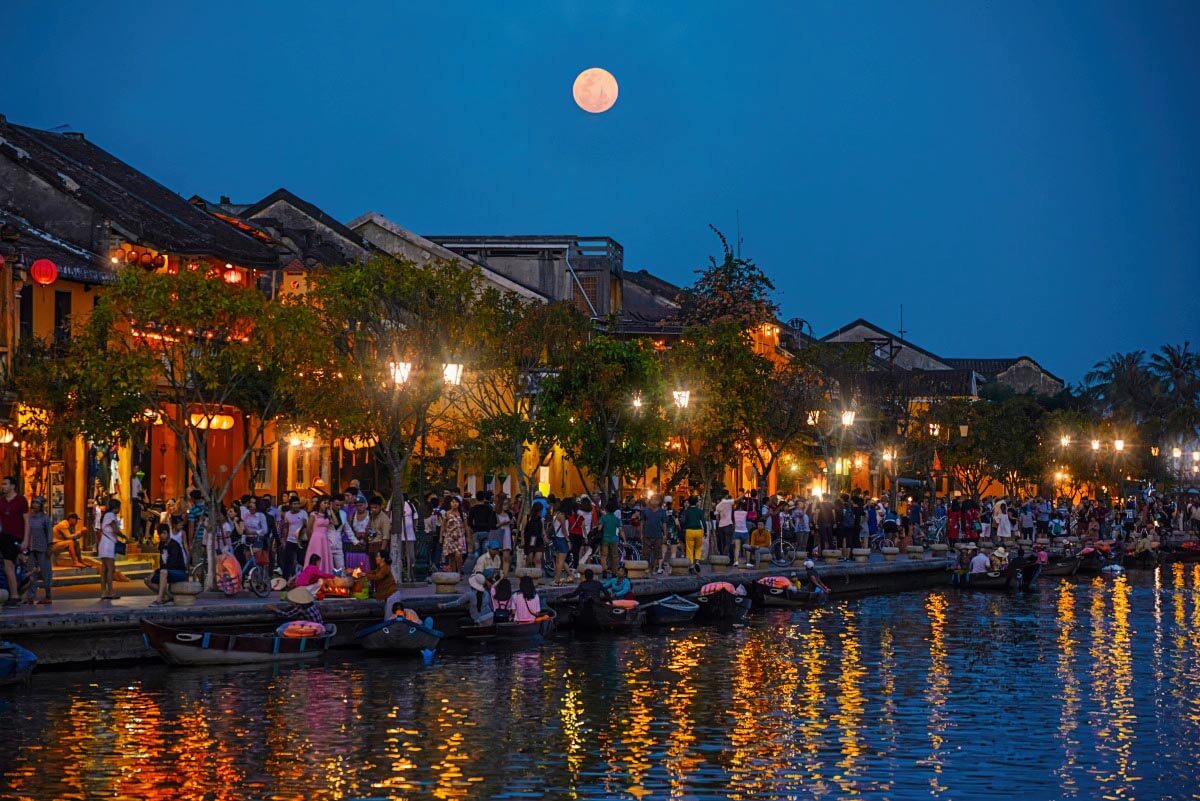
Luminar comes with a range of presets that you can quickly preview and apply, plus you can add other presets as well. I tend not to use presets a lot since I prefer to treat each photo individually. However, it is a simple matter to select several preset options to see if any are appropriate. In the case of the following photo, the option called Hyperdrive looked promising, so I applied this to the RAW file. While the photo can still use further editing, this can provide a great starting point.
RAW developer
The Develop tool is usually the best place to start. It has similar controls to what we might find in Camera RAW or Lightroom, for example. We can adjust exposure, contrast, shadows and highlights, curves, colour, and other options. This sets the stage for further adjustments.
But what really sets Luminar Neo apart is the range of special tools, some powered by AI (Artificial Intelligence). Some are extremely useful and all are fun to play with. Some come with the basic program and others must be purchased as extensions, depending on the plan you choose. Here are a few that caught my eye.
Enhance AI
This tool automatically analyzes the image and applies corrections using two sliders. The first one, Accent AI, is applied to the overall image, while the second, Sky Enhancer AI, is applied only to the sky. Because they are sliders you can decide how much enhancement to add, or if it is even necessary.
While this and most other tools are best used after you have completed the basic edits under Develop, you can on occasion use it independently when you want something quick and easy, such as for a social media posting.
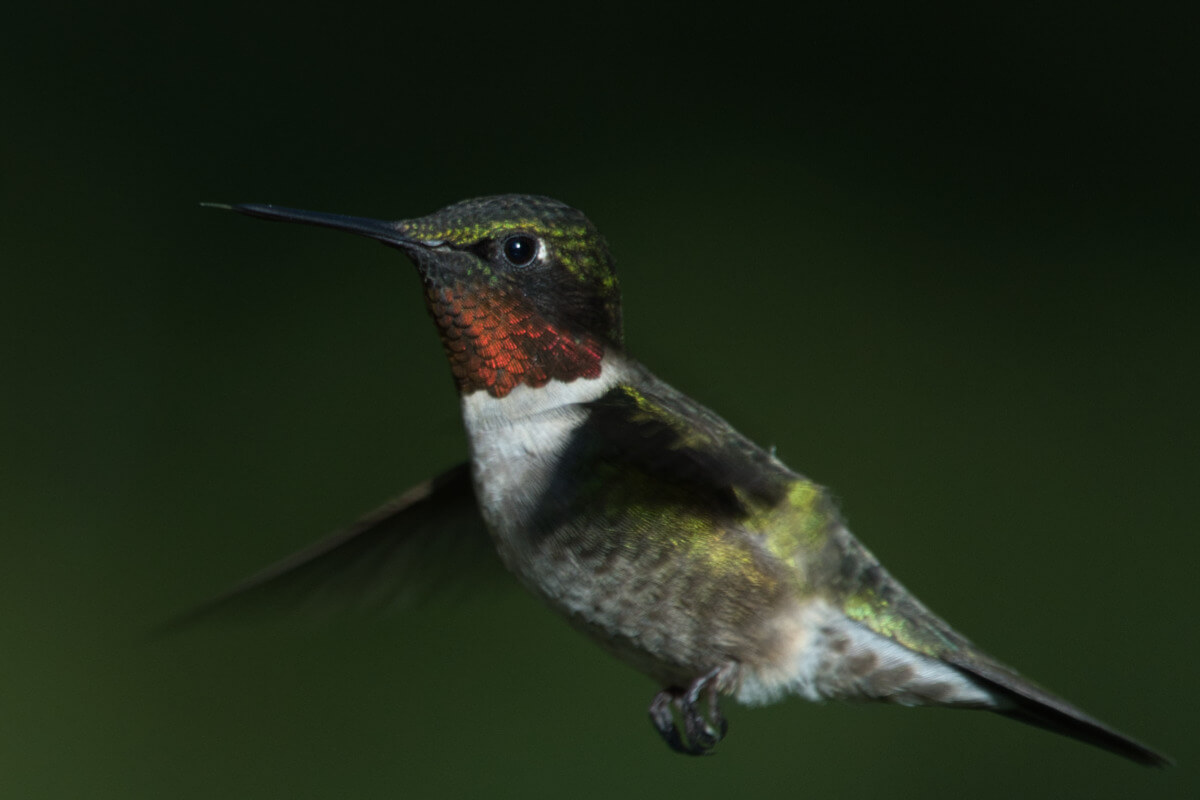
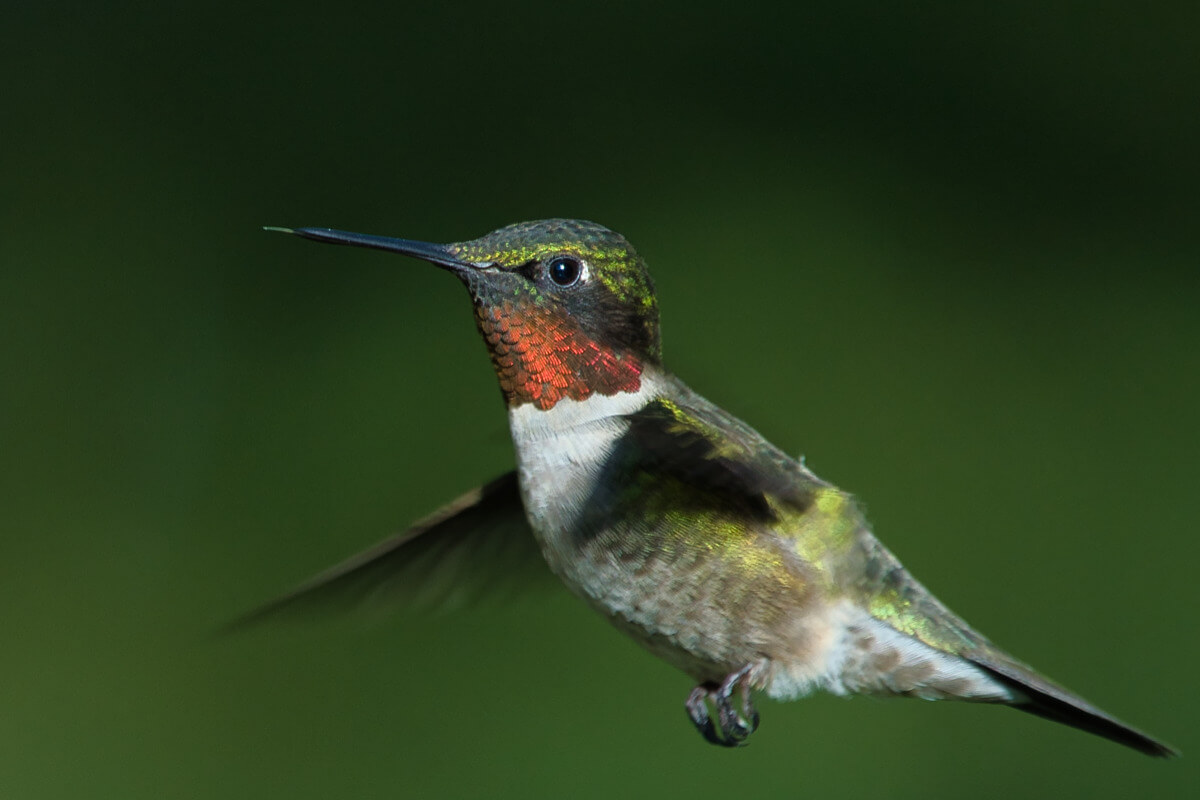
For the following example, I processed this hummingbird quickly using only two sliders – Enhance AI and Noiseless AI (with a small amount of sharpening).
Noiseless AI
I find this an especially useful tool. Noise can be an issue in a variety of photos such as when photographing wildlife (see the above hummingbird photo) since capturing moving critters often means using a high ISO which adds noise. Night sky photos are often noisy as well because high ISO is usually necessary. You can also add some sharpness as part of the Noiseless AI process. This tool analyzes the image and recommends whether you should use a Low, Middle, or High adjustment. For the hummingbird photo, a Low setting was sufficient.
Supersharp AI
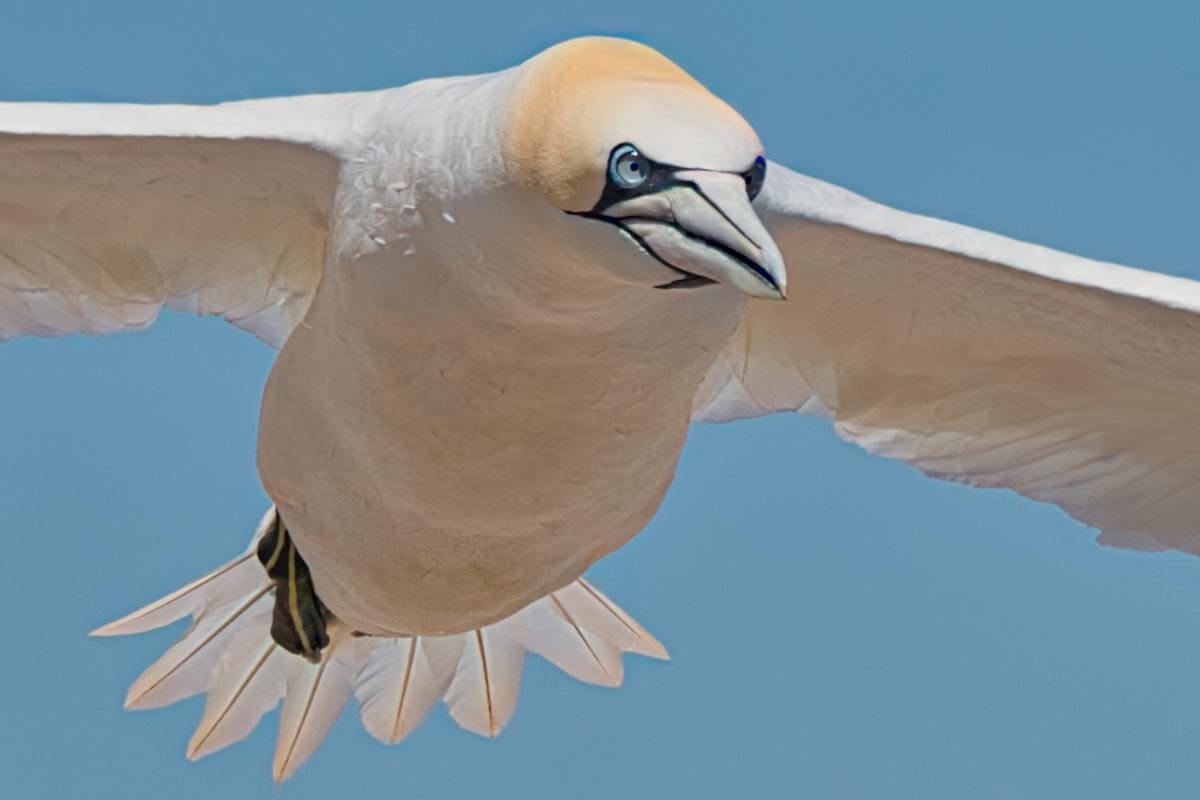
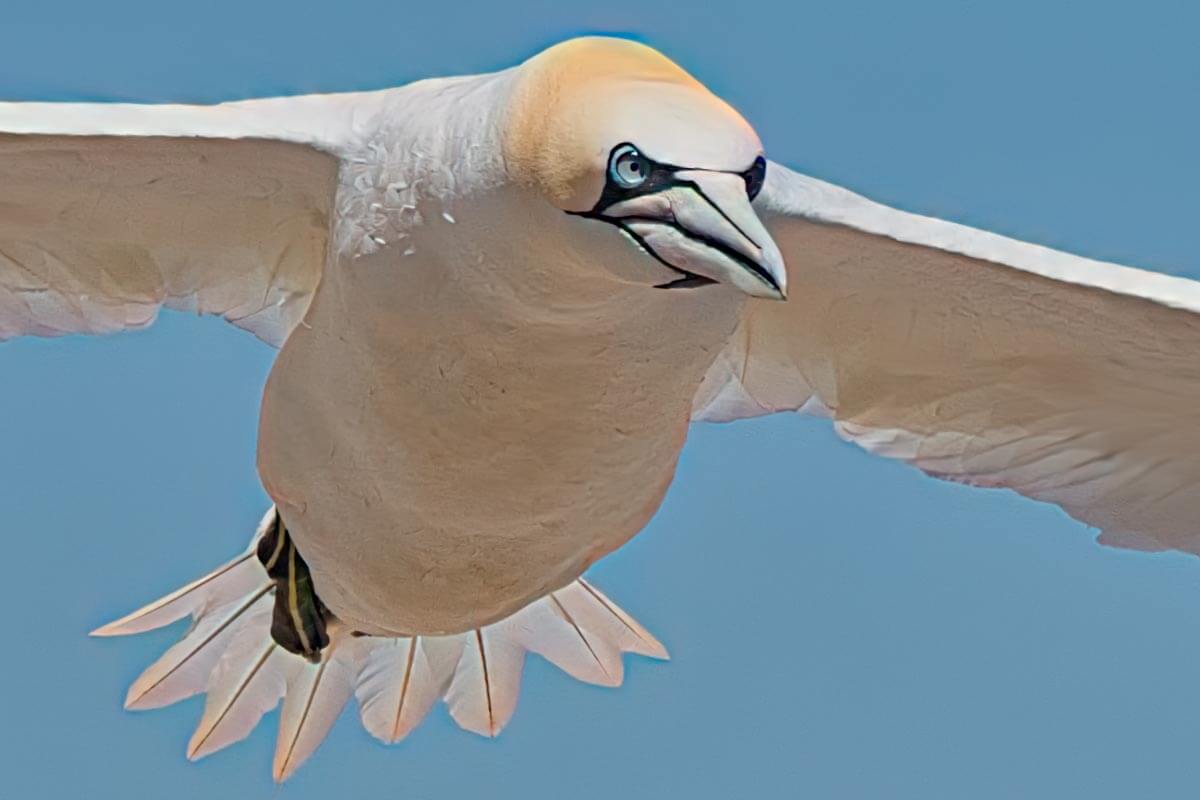
For the times when you get an otherwise great shot but the focus is slightly off because of camera shake or movement of the subject (such as with this flying gannet), Supersharp AI might be able to fix it with one click. You have the choice of Low, Middle, or High sharpening strength. For the flying gannet, I used a Middle setting. So far I have been quite impressed with this function.
Relight AI
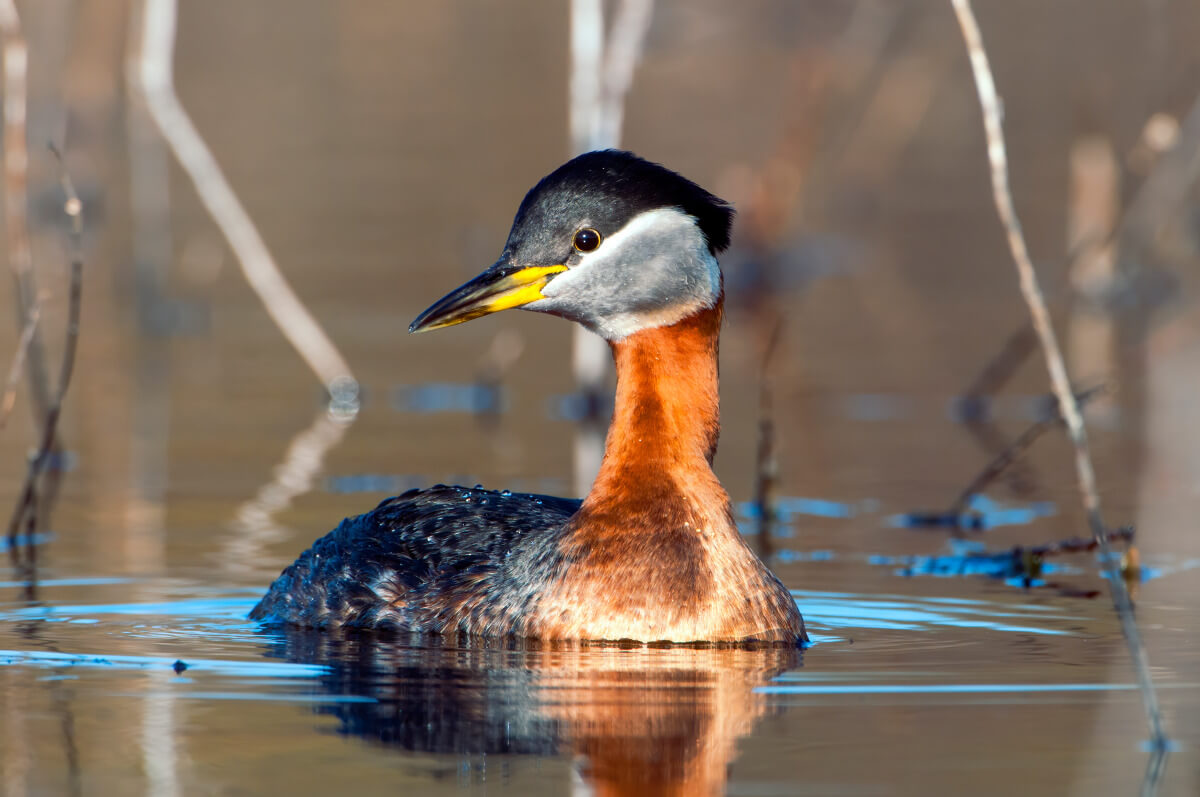
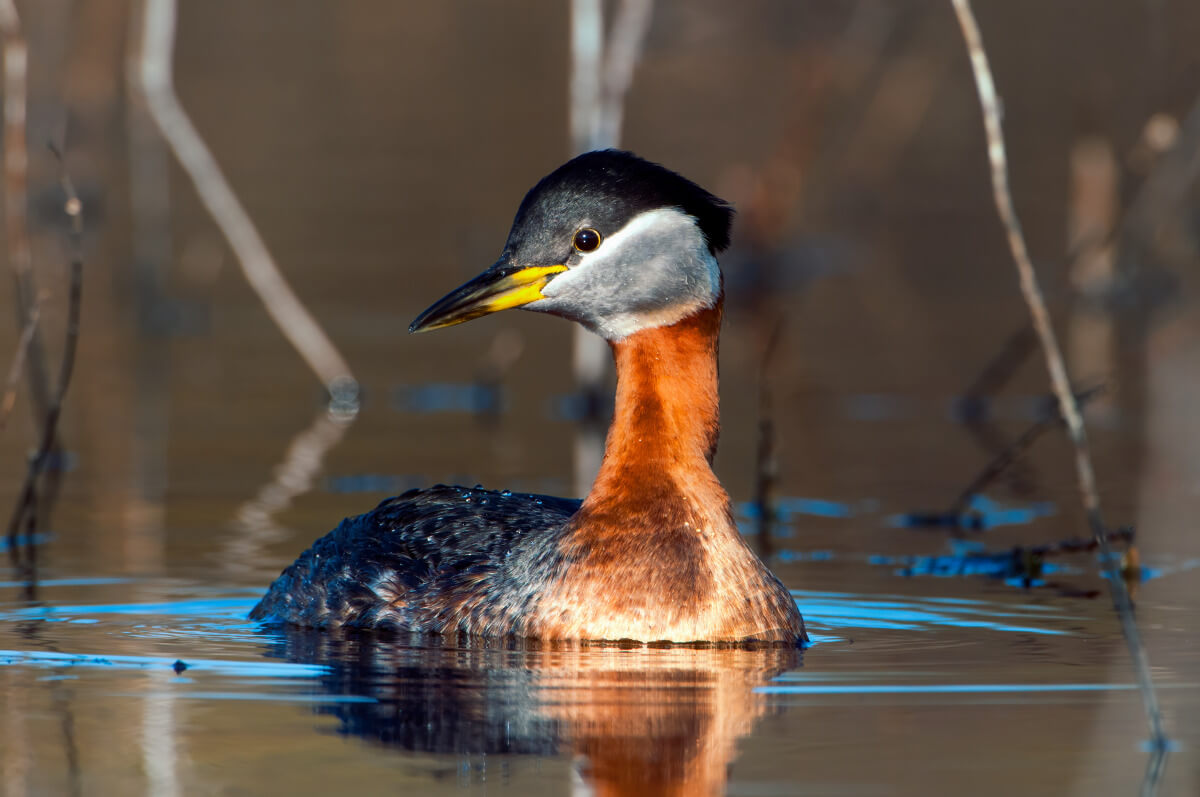
This is one of the most useful tools. It separates the lighting for near and far parts of the photo. If you want to brighten the main subject of the image which is close, yet still retain a darker background, this is fairly easy to do. Plus you can adjust the distance and decide how far or how close the change in lighting takes place. In the case of the red-necked grebe, I used the Relight AI slider to darken the background so that the bird stands out better.
Erase Tool
Occasionally there’s something in the photo that you want removed. The Erase tool can do the job with brush strokes, sometimes easily, and sometimes it takes a bit more work, depending on how complex it is. Where Luminar Neo differs from most programs is that it also has a couple of specialized object removal tools – Remove Powerlines and Remove Dust Spots.
You can remove dust spots in one click. This works remarkably well, although we can’t rely on it entirely, since it can sometimes miss a few. However, having most spots gone in one click is a big time saver even if we do have to clean up a few manually as well.
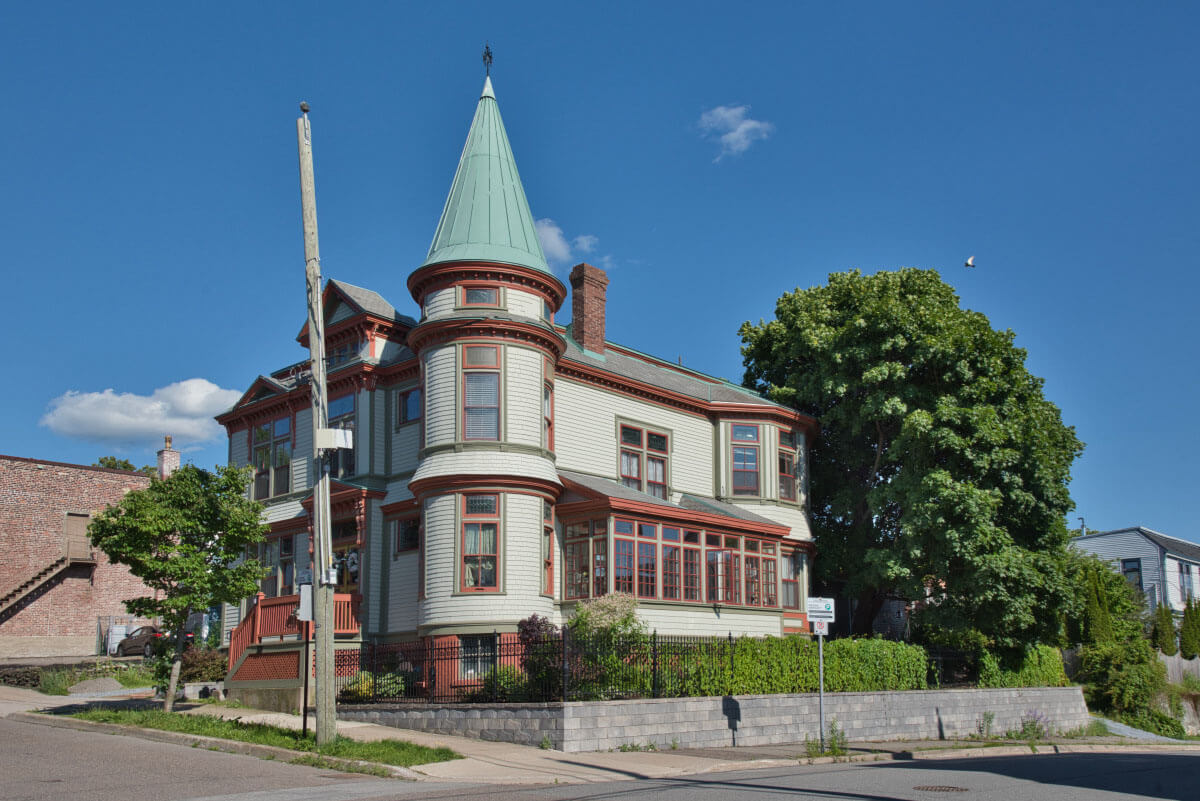
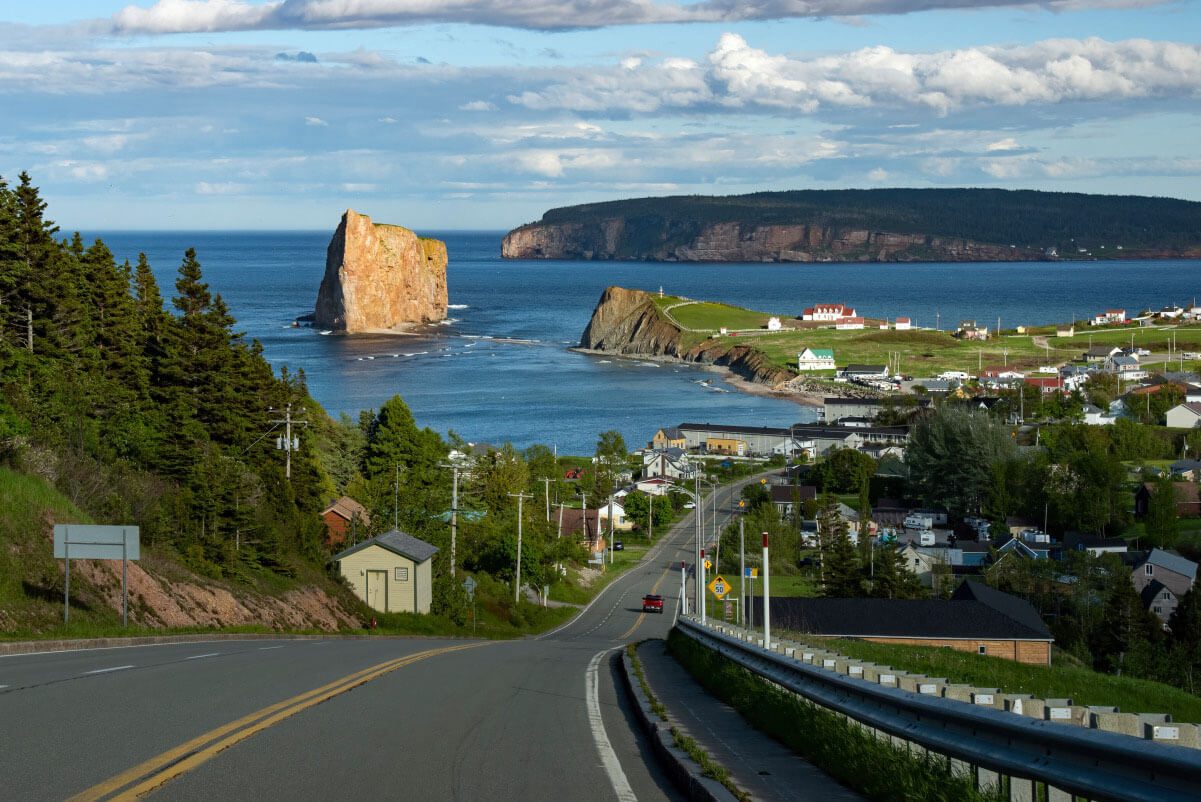
The Remove Powerlines tool is simply amazing. Taking out unsightly or obtrusive powerlines can be labour-intensive, but in the following example, all the powerlines almost magically disappeared with one click. I couldn’t even see any bits and pieces left behind such as against dark or complex areas. It simply took out all the wires at once. The power pole is still there but could be removed with some work.

Magic Light AI
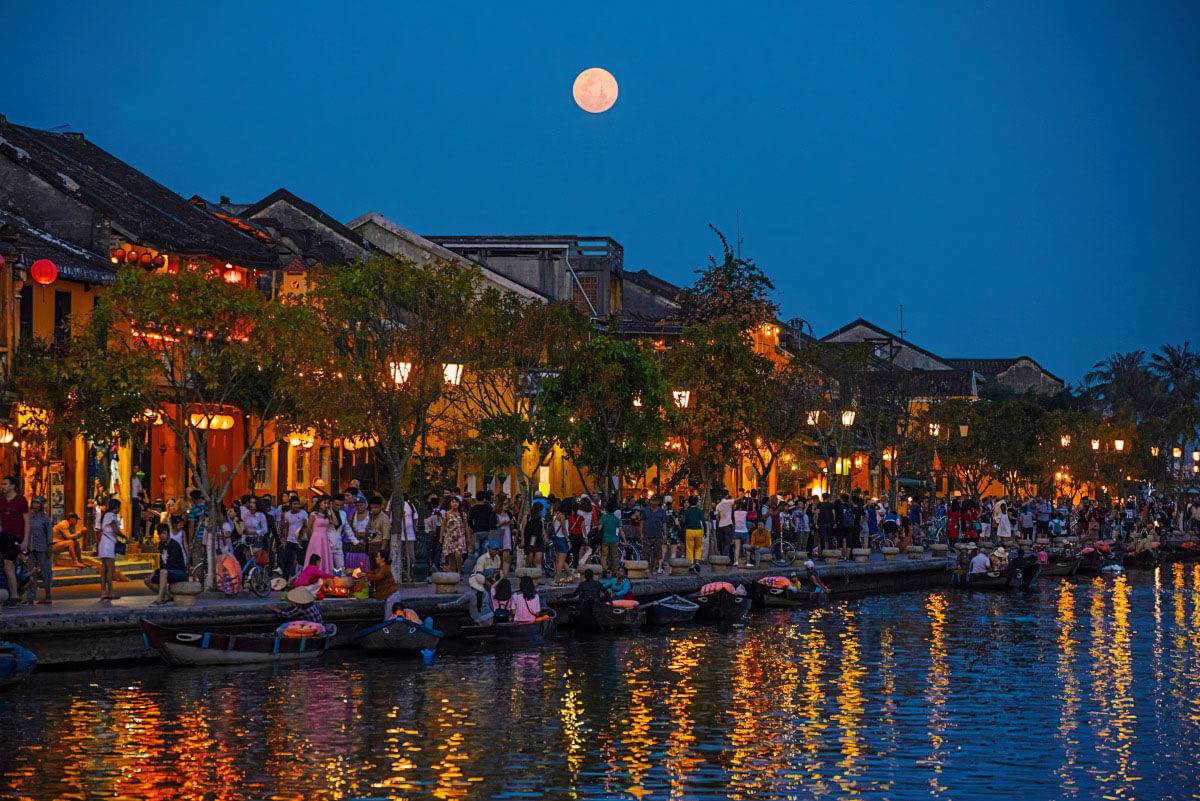
This Extension works best on artificial lights such as street lamps, although it can work on a variety of light sources. It starts by analyzing the photo for points emitting light then allows you to make them more intense and add glow and light beams. A number of adjustments make it possible to apply the appropriate amount of intensity, glow, and clearness for the situation. This is great for giving a night scene an extra kick. However, it has to be used moderately or the photo could end up looking too contrived.
Portrait Bokeh AI
This simulates the effect that we get when using a fast lens with a wide open aperture such as f/2 or f/2.8 when the subject is in focus but the background is out of focus. This is especially useful when we have a busy, distracting background such as this Master Dory Boat Builder in his shop in Nova Scotia. For the first image, I used only the Portrait Bokeh slider, then used the background brightness slider to darken the background somewhat. This only took a few seconds.


For the next photo, I went to the Relight AI function to control the light for parts of the image that are near and far. I used the Brightness Near slider to slightly increase the brightness of the man since he is the nearest part of the photo. Then I used the Brightness Far slider to decrease the brightness of the background. This too only took a few seconds. The result is an even better separation between the man and the background.

Whether or not this is the most appropriate edit is a matter of opinion. It certainly improves the image as a portrait. However, it can also be argued that preserving more detail in the background helps to give the image context and a sense of place. As in most editing, personal preference and doing what seems best in different circumstances becomes part of the process. We have to remember that photo editing is an art as much as a science.
Upscale AI
Sometimes a photo file isn’t large enough in size or resolution for the use you want – for example, it was taken with a low-resolution camera and you want to make a big print to hang on the wall. Skylum claims that you can upscale a photo up to 6 times and enhance the resolution naturally with AI. I haven’t played around with this much yet, but it certainly looks promising. We do a lot of wildlife photography and the nature of the game is that it isn’t always possible to get close enough, even with powerful telephoto lenses. Sometimes we come away with an otherwise useable shot, but it is very small in the frame. Once we crop in, the size of the image could be too small for a two-page magazine spread or for a large-sized print. We look forward to experimenting further with this function.
Mask AI
Masking is fairly easy, where we can apply a mask to only one part of the photo and make various adjustments to just that area or exclude that area from adjustments to the rest of the photo. The mask can be applied by using a brush, a linear gradient (useful for example if we want to lighten or darken the foreground of a scene), or a radial gradient (which we can apply to only a section of the frame).
Luminar Neo takes things a bit farther with Mask AI. With one click it analyzes the scene and identifies up to nine separate elements – people, skies, buildings, vehicles, water, plants, mountains, natural ground, and man-made ground (such as streets or highways). So if you want to make adjustments to only the water, it’s already separated from the rest of the frame.
It certainly isn’t perfect, and I have had mixed results with this so far. Sometimes it has difficulty separating the elements. For example, when a building is next to trees, it may not know exactly where the edge of the building ends and the trees begin, especially in low light. In some cases, it doesn’t include all the water even though the water it does identify seems to be the same colour and tone of the water that it does identify. In such cases, we can make adjustments by using a brush to add to the mask or erase parts of it. Even with having to make these extra adjustments, it tends to get most of it right, providing considerable time saving over starting a mask from scratch.
Another limitation of Mask AI is that it is currently identifies only those nine elements. For our photography, the big element that is missing is wildlife. We tried Mask AI on a photo of ducks in a pond, with a bit of ground showing on the edge of the pond. It identified water and natural ground without issue, but it didn’t identify the ducks. We hope that wildlife will be added in future updates.
HDR Merge
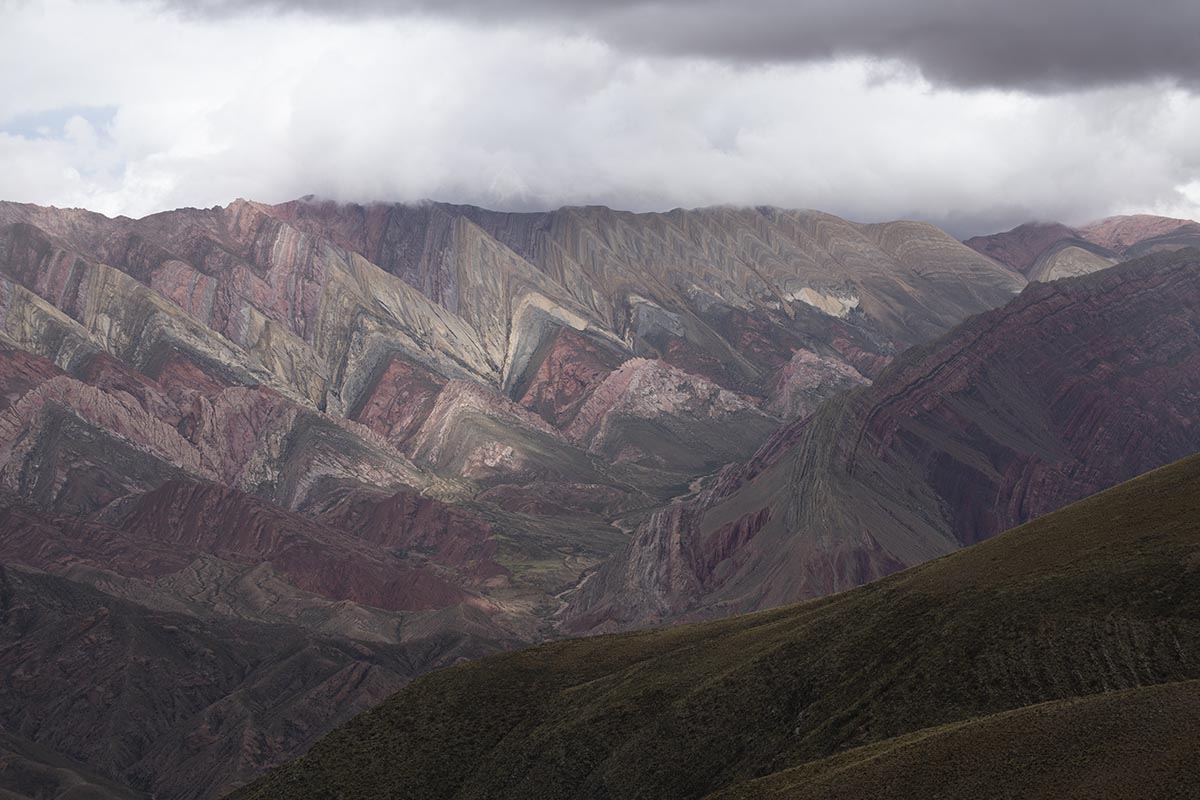
HDR, or High Dynamic Range, is useful to capture more dynamic range than is normally possible with one photo. For example, if you expose to get details in the shadows, there is the danger of blowing out the highlights. Expose for the highlights and you may lose details in the shadows. HDR can help solve this problem. For a simple example, you take one exposure as indicated as “correct” by the camera light meter, then another shot that is underexposed and another that is overexposed. Merge these into one image and we get the best of each, resulting in more accurate reproductions similar to what we see with our eyes. HDR Merge can handle up to 10 images so that you can take several bracketed shots for even more detail. The process is easy and straightforward. With the merged image you can then apply further edits to refine the final photo.
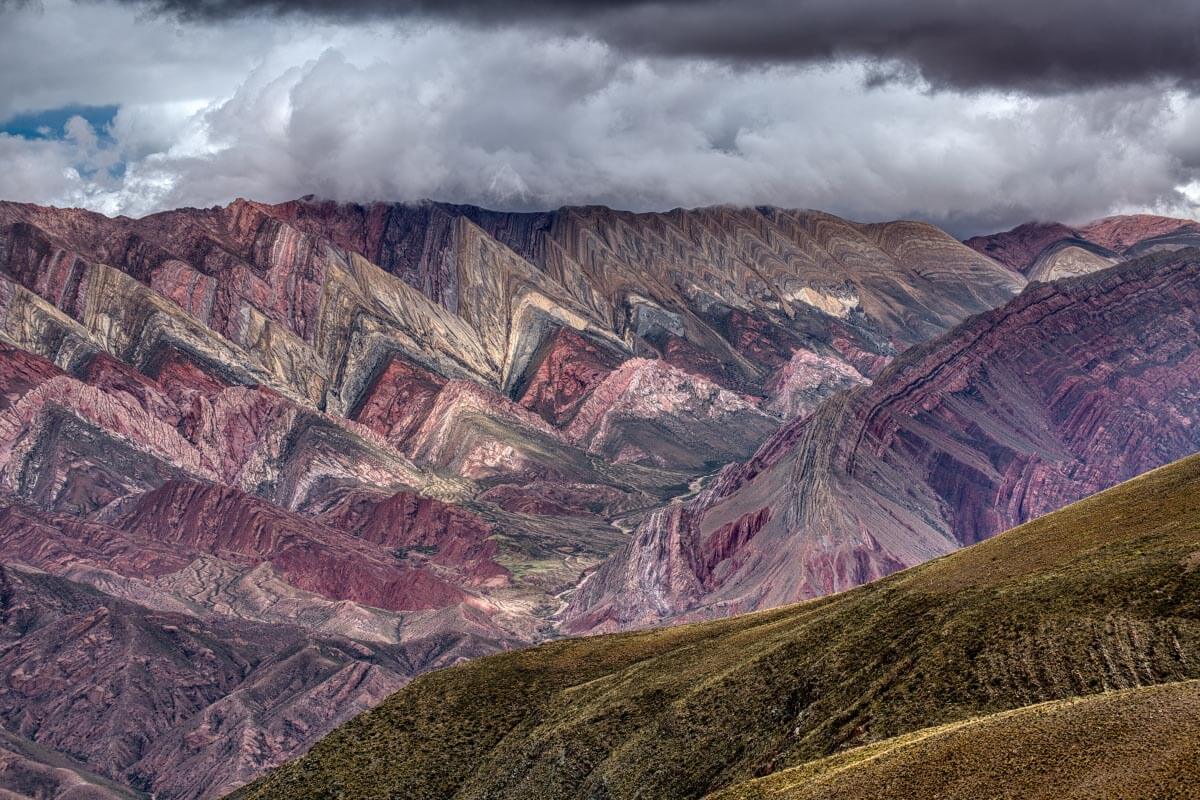
Something that I found especially impressive is how HDR Merge can merge a single photo, even though the concept of merging one item seems counter-intuitive. While not as powerful as merging a series of bracketed photos, it can provide a great starting point for further editing. And the process is super simple – just drop the photo into the HDR Merge extension and click on merge.
Going crazy with the creative process
Our photography mostly centres around travel, nature, and wildlife, so we want the resulting images to closely resemble what we saw in the field, and we tend not to like adding things to the photo that weren’t there. But if your photography is more in the realm of no-holds-barred artistry, Luminar Neo has some wild creative tools that are fun to play with. For example, you can add sunbeams to a photo, and the sky-replacement tool at first glance seems to work a lot more smoothly than that in Photoshop. In short, Luminar Neo provides a lot of potential if you like to keep it real or if you like to go crazy creating personal works of art.
This only scratches the surface of what Luminar Neo can do. I look forward to delving deeper into its capabilities and sharing some of the results in future posts.
System requirements
Before using Luminar Neo, be sure that your computer has sufficient power. These are the recommended system requirements from Skylum’s website:
Recommended system requirements for Microsoft® Windows®:
Hardware Windows PC with a mouse or similar input device
Processor Intel® Core™ i5 or better, AMD Ryzen™ 5 or better
OS version Windows 10 (64-bit only)
RAM 8 GB or more (16+ GB recommended)
Disk space 10 GB free space; SSD for best performance
Display 1280×768 or higher resolution
Graphics Compatible with OpenGL 3.3 or later
Recommended system requirements for Apple® macOS®:
Mac model Early 2010 or newer MacBook, MacBook Air, MacBook Pro,
iMac, iMac Pro, Mac Pro, or Mac Mini
Processor Intel® Core™ i5 or better, Apple M1 chip
OS version macOS 10.13.6 or higher
RAM 8 GB (16+ GB recommended)
Disk space 10 GB free space; SSD for best performance
Display 1280×768 or higher resolution
Save 10% with this Promotion Code
If you think that Luminar Neo is for you (remember, there is a 30-day money-back guarantee if you don’t find it useful), you can get 10% off by entering the promotional coupon code PhotoJourneys at check-out.
SUBSCRIBE to Photojourneys below
Feel free to PIN this article on using Luminar Neo