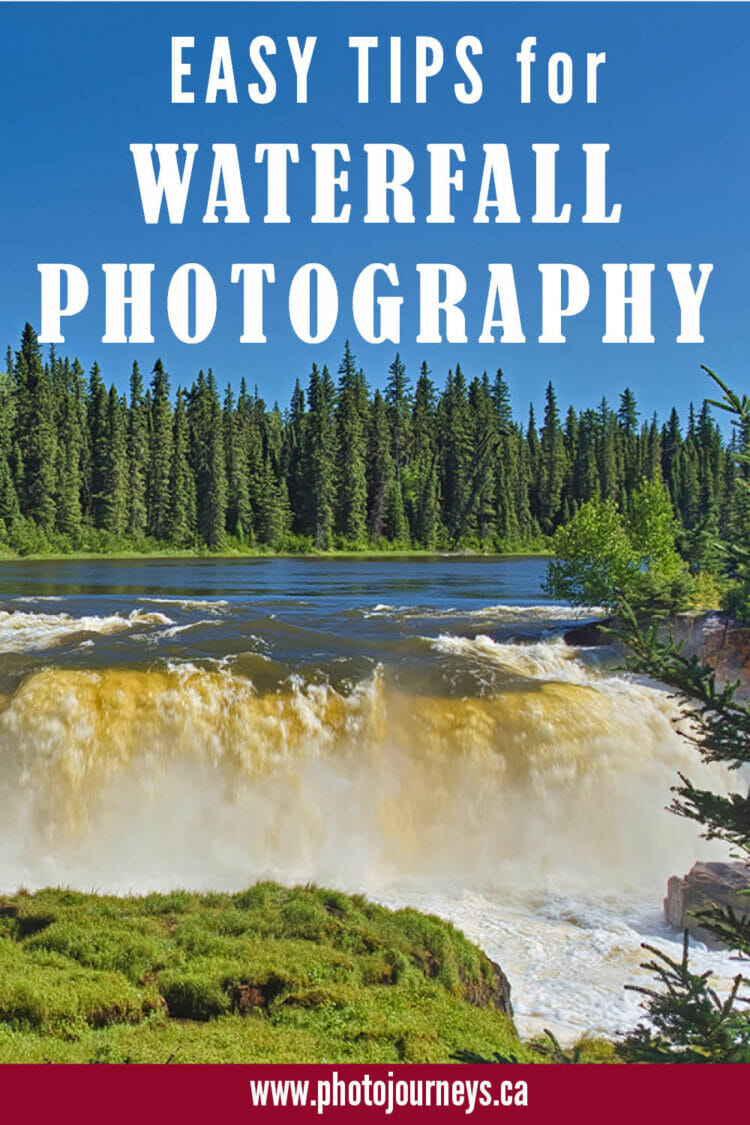
Few landscapes are as much fun to photograph as waterfalls. The best part of waterfalls or any other moving water is that we can change the look of images, often quite dramatically, by simply changing the speed of the exposure. At one extreme we can stop the action completely so that every drop of water splashing in the air stands out, or we can slow things down to give the water a smooth, silky look. There is no right or wrong as to how fast or slow you make the water. Every situation is different so it’s best to experiment with a few exposures to get the effect that you want.
Fast and furious or smooth and silky?
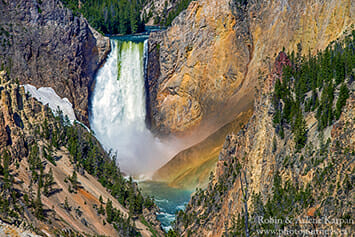
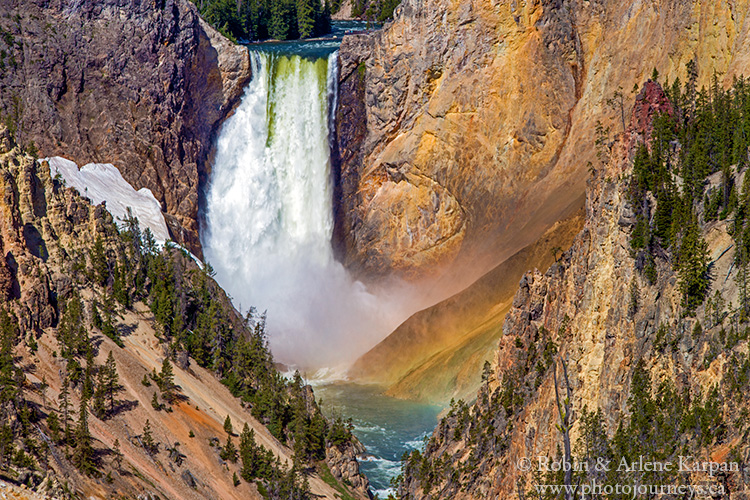
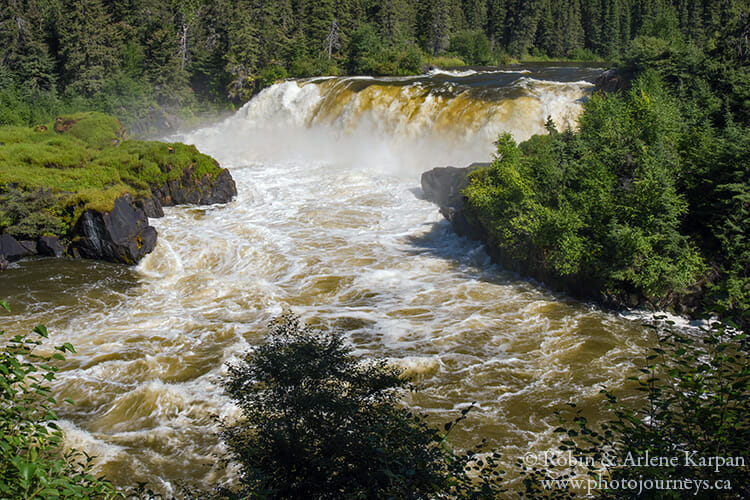
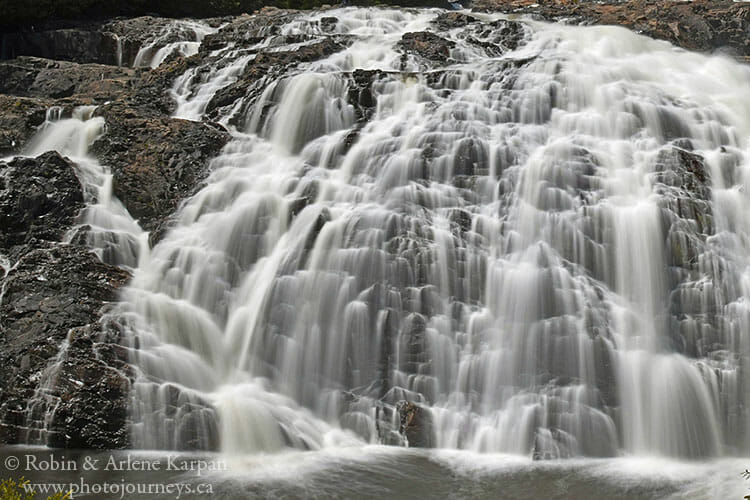
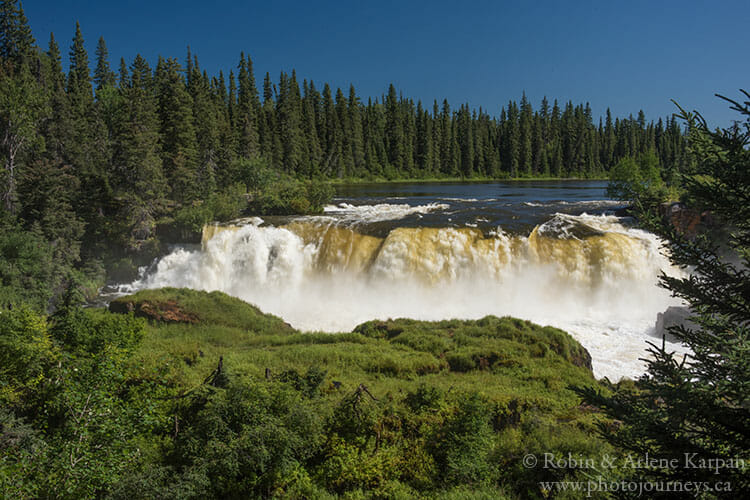
The slow, silky look tends to work best with wispy waterfalls. A big powerful waterfall loses its sense of power if slowed down too much, and there is the danger of turning it into a big white glob with little detail. For the opening photo of Yellowstone Falls, we opted for an exposure of 1/80 sec. which is reasonably close to how we would see it with our eyes. The photo of Pisew Falls in Manitoba just below has an exposure of 1/50 sec. which shows a small amount of movement without turning it into a sheet of white. The next image of Hunt Falls in Saskatchewan might be considered finding a happy medium. The 1/20 sec. shutter speed is slow enough to give it some sense of movement while not so slow that it detracts from the power of the falls.
However, there is no hard and fast rule. It’s often a matter of personal preference and your artistic vision. A slow, silky waterfall is not how we see water in real life, but it often makes for the most pleasing image. Some photographers always use long exposures for waterfalls. On the other hand, we heard a comment from another photographer who had a contrary view, insisting that water should look like water, and not like milk. We all have different tastes. Our personal approach is usually to vary things in each situation and see what works best.
How to get the silky look
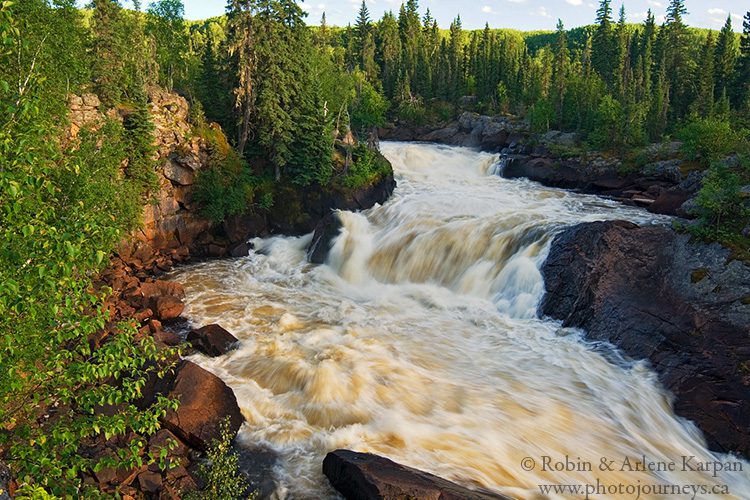
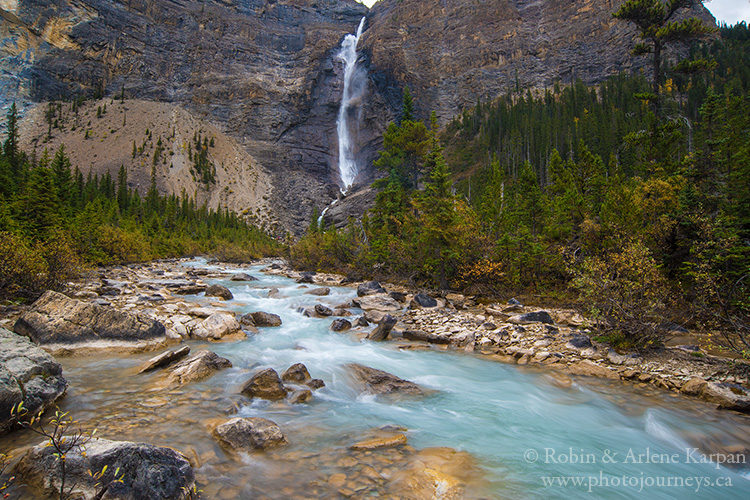
Exactly how slow your exposure needs to be to get a silky look will vary on water conditions and the effect that you’re after – from around 1/15 sec. to several seconds. The following image of Magpie River Scenic High Falls in Ontario has an exposure of 1.6 sec. and the image after that, of Takakkaw Falls in Yoho National Park, has an exposure of 1/5 sec. There is nothing magic about either setting. It’s a matter of experimenting and finding the shutter speed that best suits each image.
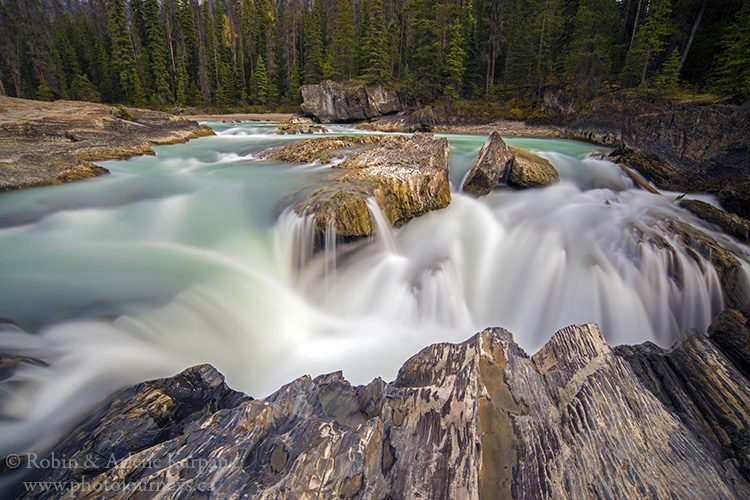
Of course, there is almost no limit to the length that we can stretch out an exposure. A more extreme example is the following image of the Kicking Horse River in Yoho National Park, which has an exposure of 15 sec. to really slow the water. It’s always a good idea to use a tripod, but for longer exposures it becomes essential. In a pinch, you might be able to set the camera on a stable rock or something, but that’s not ideal.
The biggest issue is that sometimes there is too much light to allow for a long enough exposure. Begin by setting the ISO on your camera to its lowest setting, usually 64 or 100 ISO on most current cameras. Then set the aperture to a fairly small opening such as f/16 or f/22 (the bigger the number, the smaller the opening). This then means that we need a longer shutter speed to get a proper exposure, which is what we’re after.
However, on bright sunny days, this might not be enough if you’re after a fairly long shutter speed. One option is to put on a polarizing filter, which cuts the light by 1.5 – 2 stops, allowing for a longer exposure. Using a polarizing filter is often a good idea anyway, since it also helps to cut through the glare on water. For very long exposures, the only option is to use a neutral density filter. These filters don’t affect the colour of the photo. All they do is cut the amount of light coming into the camera. Filters come in a variety of strengths such a 3, 6, or 10 stops. For example, to get a 15 sec. exposure on the Kicking Horse River image, we had to use a neutral density filter.
Dealing with different light and weather conditions
As a general rule, it’s easier to photograph waterfalls during overcast conditions when the light is more even. With less light, it’s also easier to get long shutter speeds if you’re after a silky effect. In sunshine there is more contrast between the bright white of the whitewater and the surrounding terrain, such as dark green forests or dark rocks, making it more difficult to get the right exposure for the entire scene.
Challenges with full sunlight
It’s a different matter with harsh sunlight. Then it is usually best to expose for the highlights in the water. This may mean that the surrounding terrain may come out dark, but it’s possible to bring back shadow detail in processing. On the other hand, if you expose for the overall scene, there is a danger of blowing out the highlights in the water. This may happen if the surrounding landscape is quite dark and the camera light meter gets tricked into thinking that it needs to let more light in. To prevent this, it is important to keep checking the histogram on your camera screen to make sure that you don’t overexpose. It is almost always easier to fix dark shadows than it is to try to fix overexposed highlights.
The following image of Pisew Falls is an example of the challenges of trying to photograph in harsh sunlight. The first image is the RAW file. It was exposed so that the water would not be overexposed, which left the rest of the image fairly dark. The second one is the processed image which brings back the shadow detail.

Chasing rainbows, and wind factors
The one time that we want sunlight on waterfalls is to get the rainbow effect when the sun hits the mist rising from the falls. This only happens when the sun is at the right angle. You often have to try different vantage points and times of day before a rainbow becomes visible. This is definitely the time to use a polarizing filter. It not only cuts through the glare but also helps to separate and emphasize the rainbow colours.

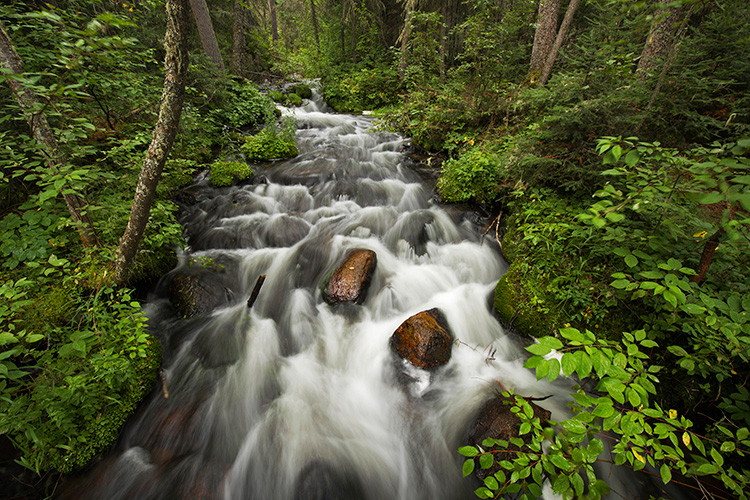
Also be aware of the wind during long exposures. A light wind will have little if any effect on the water, but movement of any surrounding vegetation be more noticeable in a long exposure. In some cases this isn’t an issue, such as the 15 sec. exposure of the Kicking Horse River. All vegetation is well in the background and any slight movement wouldn’t be noticeable. It was a different matter with the image of Karst Spring. It felt like a very quiet day, but the extremely light breeze was enough that a few leaves showed movement during the 0.6 sec. exposure. However, it is something that many people wouldn’t even notice unless it was pointed out. A stronger wind would have made taking the photo considerably more difficult.
Related waterfall posts you might like
Lake Superior waterfalls Hunt Falls Saskatchewan’s best waterfalls
SUBSCRIBE to Photojourneys below
Feel free to PIN this article on Photographing Waterfalls